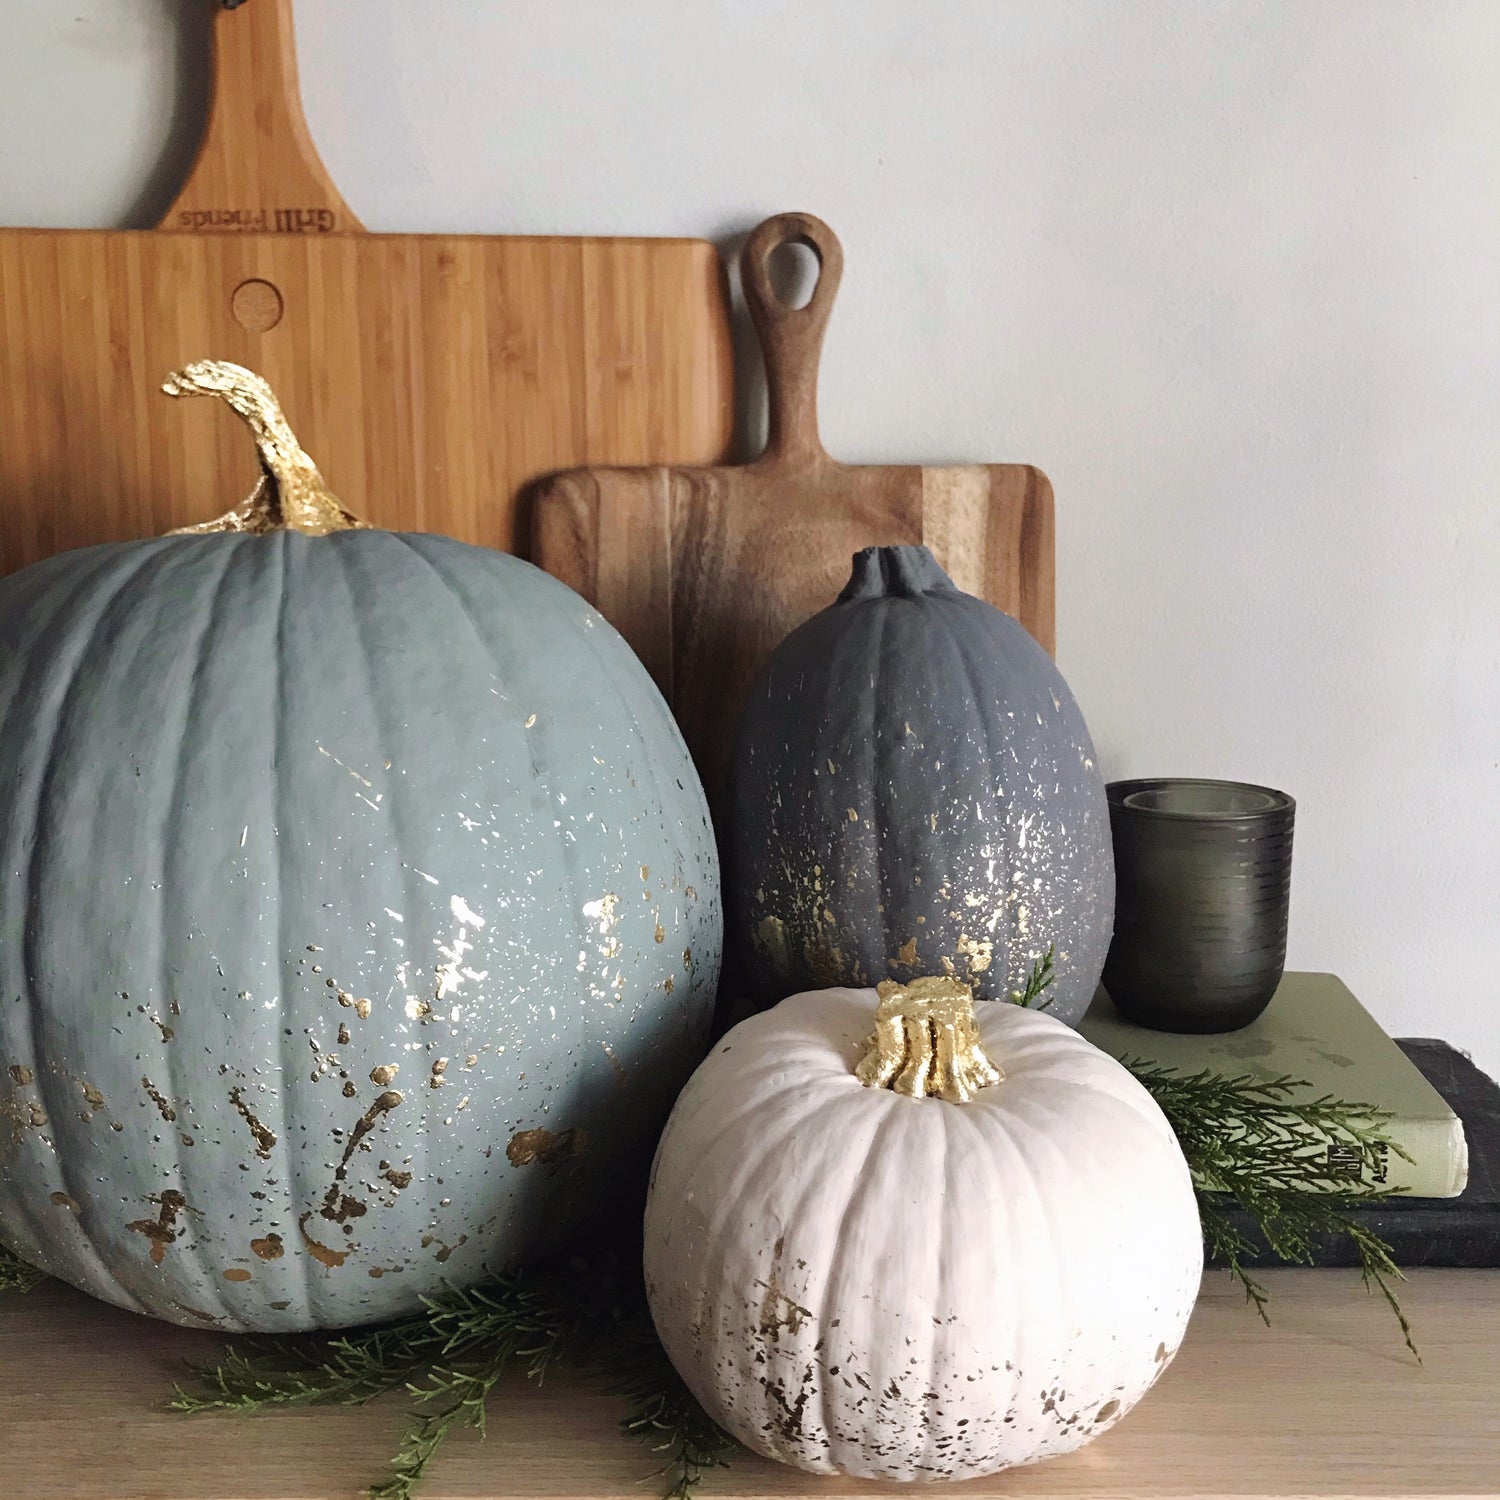
Follow the steps below to create these chic, gilded pumpkins! These will look gorgeous in your home or on your front porch.
Supplies needed:
- A Good Man is Hard to Find - One Step Paint Sample
- Vintage Affliction - One Step Paint Sample
- Bauhaus Buff - One Step Paint Sample
- Sponge Paint Brush
- Gilding Size
- Gold Leaf
- Artist Brush
- Chip Brush
Additional supplies needed:
- Pumpkins
- Cardboard box
Instructions
1. Clean the surface of your pumpkins with a damp paper towel and allow to fully dry.
2. Apply 1-2 coats of Rescue Restore Paint, using long smooth strokes and always painting into a wet edge.
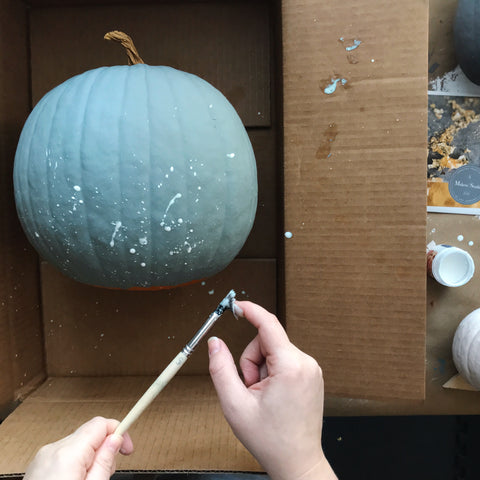
3. Once the paint dries, move the pumpkin into a cardboard box or protected area. Dip the artist brush into the size and begin to flick the brush, creating splatter patterns onto the pumpkin. This is abstract and there is no right or wrong way, so have fun with it and be creative! You may apply as much or as little of the size as you like. The more splatters you make, the more gold leaf will stick to your pumpkin.
NOTE: If you notice large globs start to form, wipe your brush off and then use it to soak up the excess size.
4. Once the size has come to tack (let sit for 10-15 minutes until slightly sticky to the touch) and has become translucent you can apply the leaf. Holding the spine of the leaf booklet with one hand, pull back the tissue with the other hand and lay the leaf down covering the area with size. Try not to touch the leaf with your fingers, but burnish (rub) into the size using the orange paper.

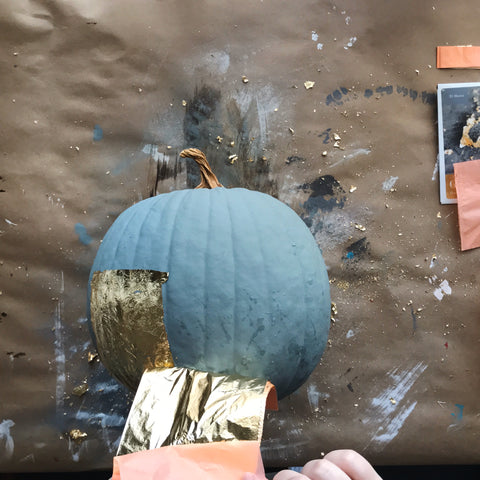
5. After burnishing (pressing and rubbing down firmly), lift the leaf packet up and begin removing excess leaf using a chip brush. This may take time since many of the splatters are so small, so keep at it until you see all the fun drops appear!

6. Continue to roll the pumpkin and repeat steps 3-5 until fully covered with leaf as desired.
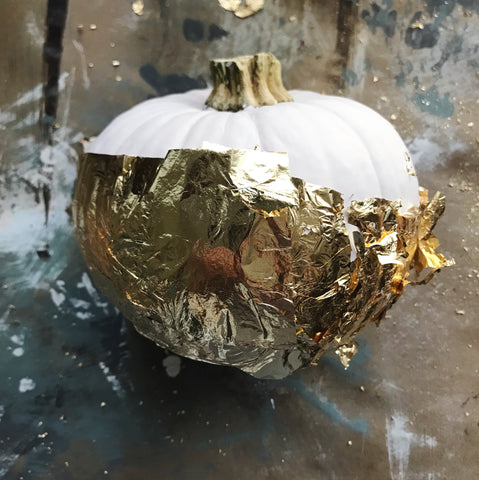

7. Using the same artist brush, apply size to the stem, then repeat steps 4-5.


Finally, once you're done you can enjoy your newly created gilded pumpkins! Put them outside or inside your home and enjoy the compliments you will receive!
Leave a comment