Inside A Makers' Studio
Inside A Makers' Studio

Craft Luxurious Candles from Home
DIY Candle Workshop: Crafting Your Own Luxury Candles at Home
Introduction
Creating your own luxury candles at home is a rewarding and enjoyable craft that can enhance your living space with beautiful fragrances and personalized touches. In this guide, we will walk you through the process of making homemade candles using the A Makers' Studio Homemade Candle Kit. This kit provides all the necessary materials and instructions, making it easy for beginners to get started. Whether you want to make candles for yourself or as gifts, this step-by-step guide will help you create stunning and fragrant candles.
Materials Needed
- A Makers' Studio Homemade Candle Kit
- Double boiler or microwave
- Measuring cup
- Spoon
- Hairdryer (optional for finishing touches)
Step-by-Step Candle Making Process
1. Prepare Your Workspace
Set up a clean and organized workspace. Ensure you have all the materials from the kit within reach. If using a double boiler, fill the bottom pot with water and bring it to a boil.
2. Melt the Wax
Place the soy wax pellets in the top pot of the double boiler or in a microwave-safe container. If using a microwave, heat the wax in intervals, stirring between each until fully melted.
3. Add Essential Oils
Once the wax is melted, add your choice of essential oils. The kit includes lavender, grapefruit, vanilla, lemon, and jasmine. For a 6 to 8 oz candle, add approximately 14 drops of essential oil. Adjust the amount to your preference for fragrance strength.
4. Prepare the Containers
Place the wicks in the center of the glass containers. The kit includes both wooden and soy wicks. Use the provided clips to secure the wicks in place.
5. Add Color (Optional)
If you wish to color your candles, add the wax pigment chips to the melted wax and stir until fully dissolved.
6. Pour the Wax
Carefully pour the melted wax into the prepared containers. Leave some space at the top if you plan to add decorative elements. Allow the wax to cool slightly before moving on to the next step.
7. Add Decorations
Use the silicone molds included in the kit to create decorative shapes, such as succulents, from the remaining wax. Pour the wax into the molds and let it set. You can speed up the process by placing the molds in the freezer. Once set, gently press the decorative shapes onto the top of the candles.
8. Finishing Touches
If needed, use a hairdryer to slightly melt the top layer of the candle and ensure the decorations adhere properly. Trim the wicks to about 1/4 inch above the wax surface.
Tips and Tricks
- Fragrance Blends: Experiment with different combinations of essential oils to create your own signature scents.
- Decorative Elements: Add dried flowers, herbs, or other natural materials to the wax for a personalized touch.
- Storage: Store your candles in a cool, dry place to maintain their quality and fragrance.
Benefits of A Makers' Studio Homemade Candle Kit
The A Makers' Studio Homemade Candle Kit provides all the essential materials and easy-to-follow instructions to create high-quality, natural candles at home. The kit includes organic soy wax, premium essential oils, and beautiful containers, ensuring you can craft luxury candles that are both beautiful and safe for your home.
Why Choose This Kit?
- Convenience: All materials are included, eliminating the need to purchase items separately.
- Quality: The kit uses natural and organic ingredients, ensuring a healthier home environment.
- Customization: With a variety of essential oils and decorative options, you can create candles that match your personal style.
- Value: The kit is a cost-effective way to enjoy luxury candles, with enough materials to make multiple candles.
Conclusion
We hope this guide has inspired you to try making your own luxury candles at home. The A Makers' Studio Homemade Candle Kit makes it easy and enjoyable to create beautiful, fragrant candles that you can be proud of. Whether you're looking for a new hobby, a unique gift idea, or a way to enhance your home, this kit is the perfect solution. Happy crafting!
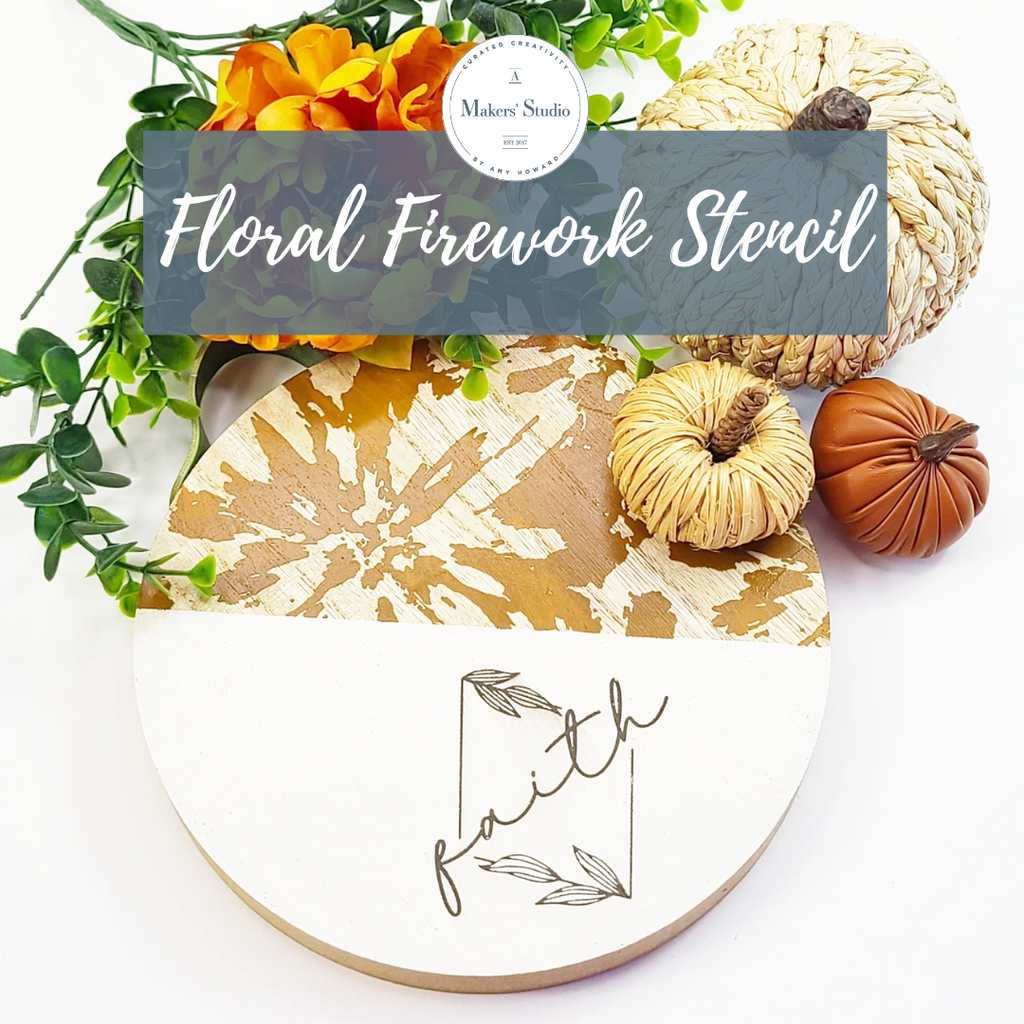
Fun Fall DIY
The perfect cutting board for the upcoming FALL season. This stencil will create a fabulous background on any surface. Watch Lianep from DIY Beauty on Purpose as she takes you step by step on this fun DIY decor!
Products Needed:
Additional Supplies:
- Masking Tape
- Scissors
HOW TO

How To: Wood Block Pumpkins
It's (almost) fall y'all! We have fabulous new Mesh Stencil designs dropping for the season. Watch Lianep from DIY Beauty on Purpose use the NEW Birds and Buttercups Mesh Stencil to create wooden fall décor pieces. Don't miss it; we can't wait to see what you make!
Shop What She Used:
- Birds and Buttercups - Mesh Stencil
- Angled Squeegee
- English Boxwood - One Step Paint
- Midnight Dreams - One Step Paint
- Ballet White - One Step Paint
- Well I Declare - Gel Art Ink
Additional Supplies:
- Wood Blocks
- Short Wood Branches (for pumpkin stems)
- Jute or Twine
- Fall Leaves (fake or real)
HOW TO

For more fun tutorials and products, visit our blog at A Makers' Studio.com!
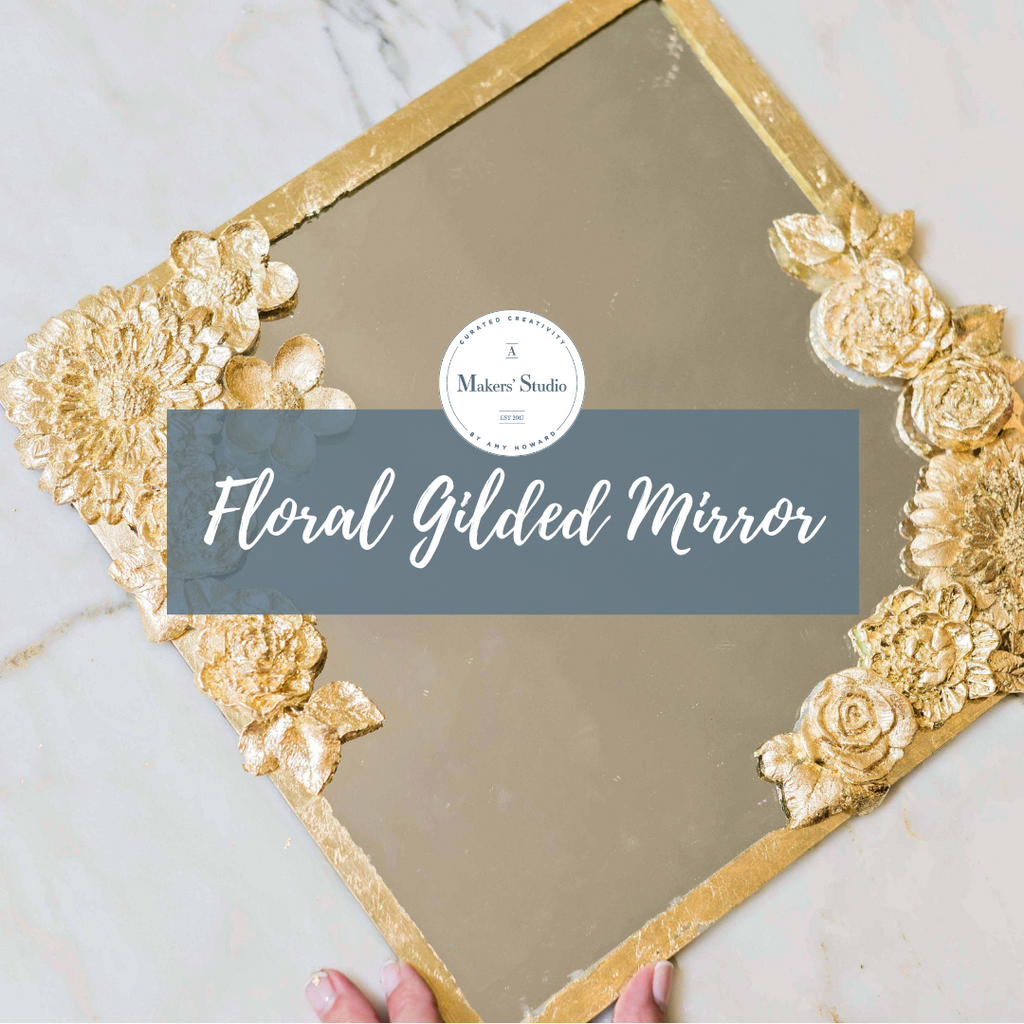
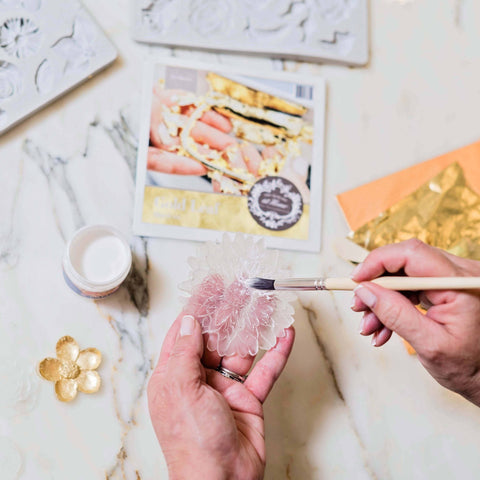
Floral Gilded Mirror
This DIY takes a plain or thrifted mirror and turns it into your favorite piece of décor. Decorate your home with custom pieces made yourself with just a few products from A Makers' Studio. Whether you enjoy a sleek modern look or an antique vintage vibe, our new line of Decorate Molds are a must have.
Products Needed:
- Acrylic Glacier Resin Bundle
- Your Choice of Decorative Mold (we used My Flower Garden and Rose Garden)
- Gilding Size
- Your Choice of Leaf (we used Gold Leaf)
- Resin Measuring Cup (or any disposable cup on hand)
- Artist Brush (or any small paint brush)
- Chip Brush (or any medium sized paint brush)
- Light and Dark Wax (optional to antique)

Step 1
To make your final piece more flexible (if applying to curved surfaces), simply pour in your mixture of 60% resin with 40% hardener and mix well for 3 minutes. Pour into the mold and allow to dry overnight. Pop out your design and apply with super glue to your frame, furniture, or decorative object.
The recipe to make the resin very hard and inflexible would be a 1:1 ratio of resin and hardener. Measure to ensure exact mixing ratios. Your working time is 20 minutes once mixed. Your gel time is 30 minutes. Allow the surface to dry for 6-9 hours. For crafting, your through dry time is 10-14 hours. We recommend letting it cure overnight.
If you prefer using air dry clay in lieu of resin, you will notice some shrinkage and cracking. Be aware that air dry clay will not give you the detail that you can get with Resin.

Pour mixture into your choice of Decorative Mold and let cure overnight. Pop out of the mold once hardened.