Inside A Makers' Studio
Inside A Makers' Studio
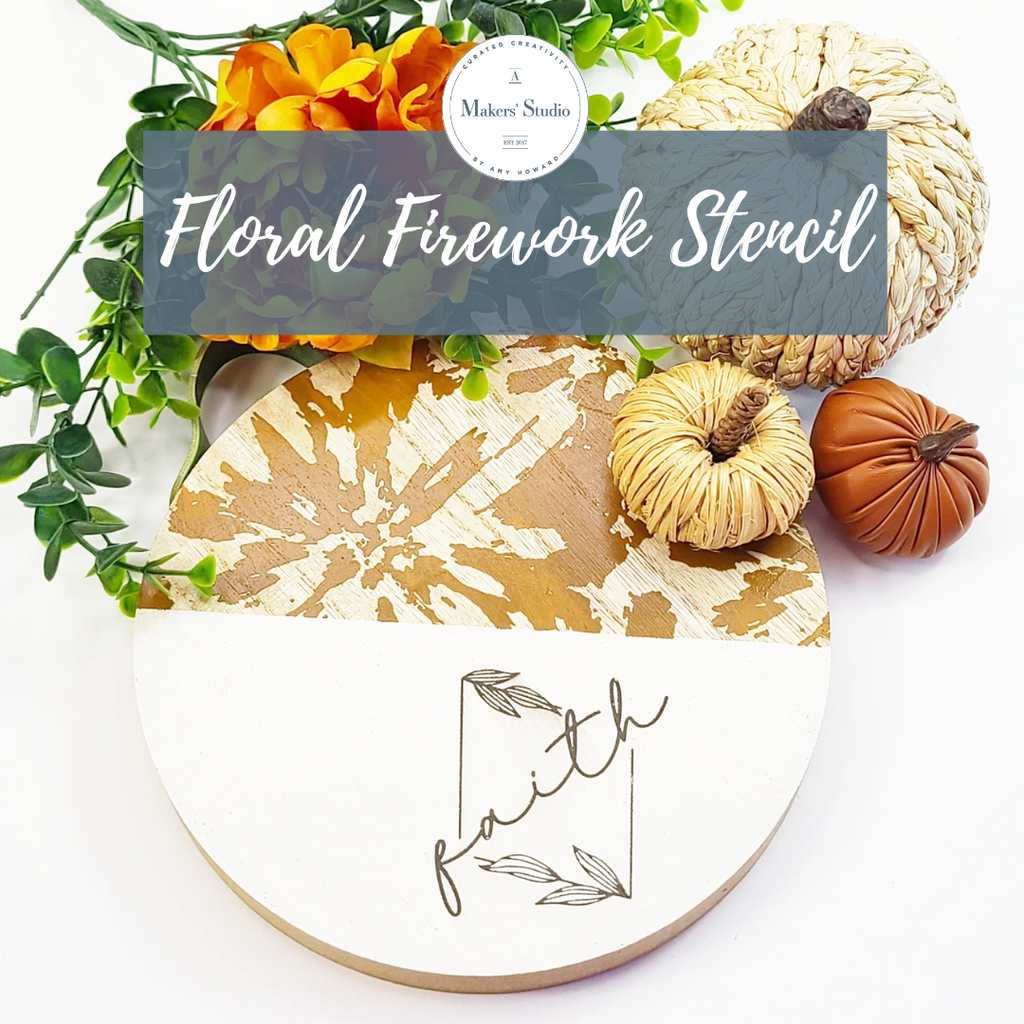
Fun Fall DIY
The perfect cutting board for the upcoming FALL season. This stencil will create a fabulous background on any surface. Watch Lianep from DIY Beauty on Purpose as she takes you step by step on this fun DIY decor!
Products Needed:
Additional Supplies:
- Masking Tape
- Scissors
HOW TO
Step One - Prep!
Use masking tape to divide the cutting board into two sides. Overall, you can place the tape in the middle making the sides equal or however you would like. Lianep placed her masking tape at an angle.
Step Two - Paint!
Paint one side with the One Step Paint. You may pick other colors than what Lianep used. Remove the masking tape as soon as you are finished painting.
Step Three - Stencil!
Once the paint is fully dry, fold the Floral Fireworks Mesh Stencil in half. Lay it's backing over the side of the cutting board that hasn't been painted. Rub the stencil firmly into the wood to make sure it is adhered very well. To protect the painted side you can put some masking tape over the paint to avoid getting the Chalk Art on it.
Use the Angled Squeegee with the Heart of Gold Chalk Art to spread the paste over the Stencil, making sure to cover all areas. If you used masking tape to protect the painted side remove it first before removing the stencil.
Once done, slowly peel the stencil away from the cutting board (if you see any unpainted areas as you're removing the stencil, just lay it back down and add more paint over that area). Once fully removed, immediately wash with warm water and mild soap or put into a bath of water to soak. Once all of the paint is washed off of the stencil, lay it adhesive side up to air dry.
Once the cutting board is fully dry we are going to cut the Floral Mesh Stencil out of the stencil pack. Place the stencil on the painted side. Rub the stencil firmly into the wood to make sure it is adhered very well. Use the Angled Squeegee with Slow As Molasses Chalk Art to spread the paste over the Stencil. Once you are finished, slowly peel the stencil away from the cutting board and clean the stencil.
Step Five - Enjoy!
Now you can enjoy this beautiful fall décor in your kitchen, as a centerpiece to your table, sitting on your counter, or a a gift to a friend!

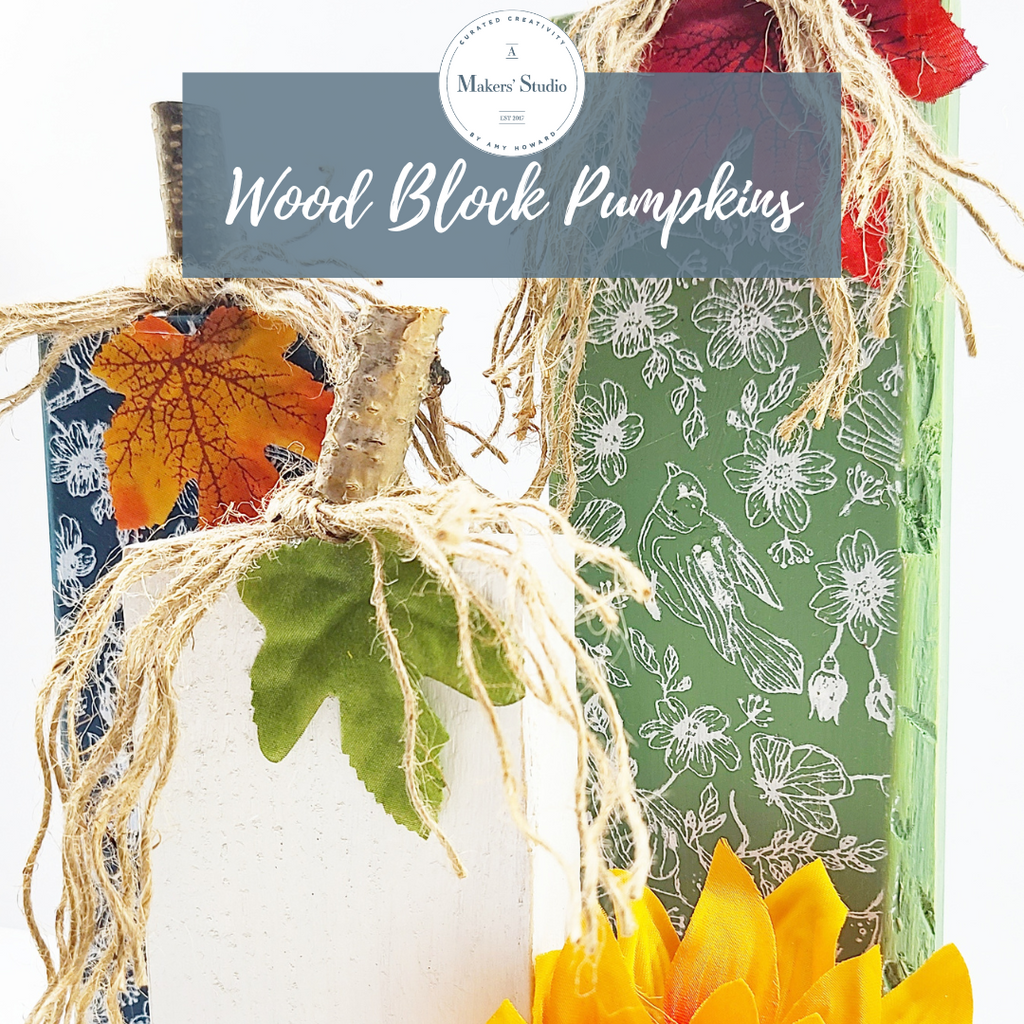
How To: Wood Block Pumpkins
It's (almost) fall y'all! We have fabulous new Mesh Stencil designs dropping for the season. Watch Lianep from DIY Beauty on Purpose use the NEW Birds and Buttercups Mesh Stencil to create wooden fall décor pieces. Don't miss it; we can't wait to see what you make!
Shop What She Used:
- Birds and Buttercups - Mesh Stencil
- Angled Squeegee
- English Boxwood - One Step Paint
- Midnight Dreams - One Step Paint
- Ballet White - One Step Paint
- Well I Declare - Gel Art Ink
Additional Supplies:
- Wood Blocks
- Short Wood Branches (for pumpkin stems)
- Jute or Twine
- Fall Leaves (fake or real)
HOW TO
Step One - Prep!
Cut a 2x4 or other scrap wood into three rectangles (one tall, one medium, one short). Overall, they may be as tall or short as you like. Lianep made hers 11", 9", and 7" tall from tallest to shortest.
Step Two - Paint!
Paint each block a different color using the One Step Paint. You may pick other colors than what Lianep used, and you could also paint each block the same base color.
Step Three - Stencil!
Once the paint is fully dry, peel the Birds and Buttercups Mesh Stencil off of it's backing and lay over the front of the first block. Rub the stencil firmly into the wood to make sure it is adhered very well.
Use the Angled Squeegee with the Gel Art Ink to spread the Ink over the Stencil, making sure to cover all areas.
Once done, slowly peel the stencil away from the wooden block (if you see any unpainted areas as you're removing the stencil, just lay it back down and add more paint over that area). Once fully removed, immediately wash with warm water and mild soap or put into a bath of water to soak. Once all of the paint is washed off of the stencil, lay it adhesive side up to air dry.
Once the stencil is fully dry, repeat as desired on the other wooden blocks.
Step Four - Decorate!
Attach the wood branch pumpkin stems to the top of your painted wooden blocks. You may drill a hole and use a dowel to attach or you may use hot glue.
Take several strands of the jute and tie them around the base of the pumpkin stem. Add in the fall leaves by tying the stems in with the jute or hot gluing to the top of the wooden block.
Step Five - Enjoy!
Now you can enjoy this beautiful fall décor on your porch, as a centerpiece to your table, sitting on your counter, or a a gift to a friend!

For more fun tutorials and products, visit our blog at A Makers' Studio.com!