Inside A Makers' Studio
Inside A Makers' Studio

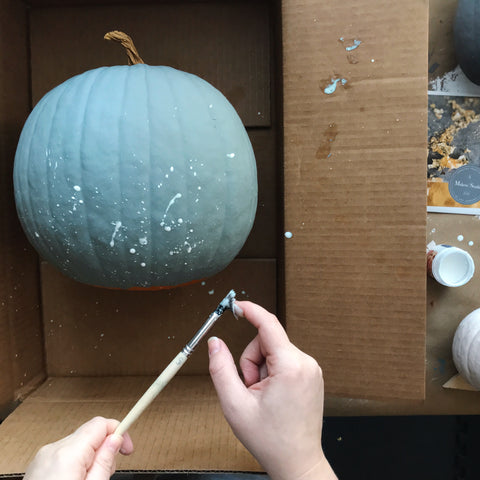
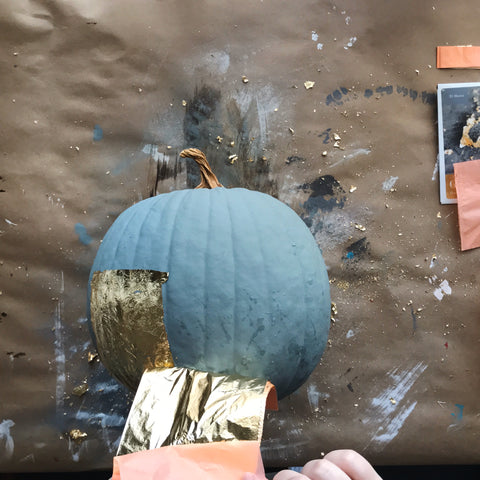
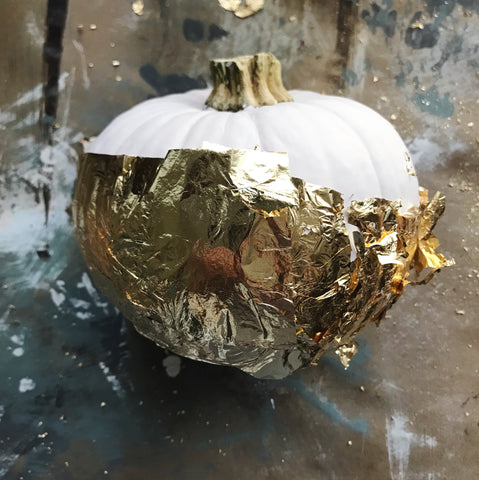
DIY Gilded Splatter Pumpkins
Follow the steps below to create these chic, gilded pumpkins! These will look gorgeous in your home or on your front porch.
Supplies needed:
- A Good Man is Hard to Find - One Step Paint Sample
- Vintage Affliction - One Step Paint Sample
- Bauhaus Buff - One Step Paint Sample
- Sponge Paint Brush
- Gilding Size
- Gold Leaf
- Artist Brush
- Chip Brush
Additional supplies needed:
- Pumpkins
- Cardboard box
Instructions


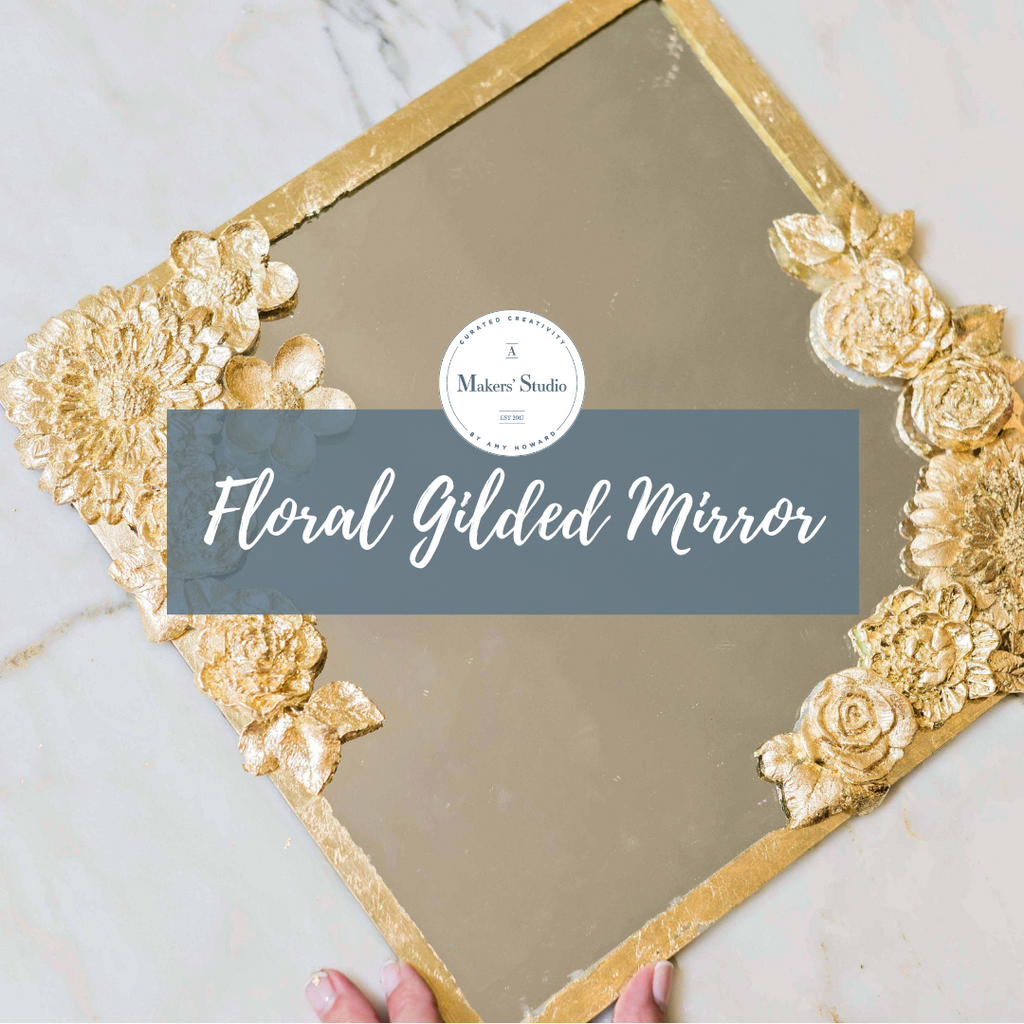
Floral Gilded Mirror
This DIY takes a plain or thrifted mirror and turns it into your favorite piece of décor. Decorate your home with custom pieces made yourself with just a few products from A Makers' Studio. Whether you enjoy a sleek modern look or an antique vintage vibe, our new line of Decorate Molds are a must have.
Products Needed:
- Acrylic Glacier Resin Bundle
- Your Choice of Decorative Mold (we used My Flower Garden and Rose Garden)
- Gilding Size
- Your Choice of Leaf (we used Gold Leaf)
- Resin Measuring Cup (or any disposable cup on hand)
- Artist Brush (or any small paint brush)
- Chip Brush (or any medium sized paint brush)
- Light and Dark Wax (optional to antique)

Step 1
To make your final piece more flexible (if applying to curved surfaces), simply pour in your mixture of 60% resin with 40% hardener and mix well for 3 minutes. Pour into the mold and allow to dry overnight. Pop out your design and apply with super glue to your frame, furniture, or decorative object.
The recipe to make the resin very hard and inflexible would be a 1:1 ratio of resin and hardener. Measure to ensure exact mixing ratios. Your working time is 20 minutes once mixed. Your gel time is 30 minutes. Allow the surface to dry for 6-9 hours. For crafting, your through dry time is 10-14 hours. We recommend letting it cure overnight.
If you prefer using air dry clay in lieu of resin, you will notice some shrinkage and cracking. Be aware that air dry clay will not give you the detail that you can get with Resin.

Pour mixture into your choice of Decorative Mold and let cure overnight. Pop out of the mold once hardened.


DIY Gilded Charcuterie Board & Stenciling Furniture
Supplies:
- Mesh Stencil – Classic Borders
- 4oz Sample – Weybridge White
- Gilding Size
- Imitation Gold Leaf
- Chip Brush
- Foam Dome Brush
Additional Supplies Needed:
- Wood Cutting Board (Hobby Lobby)
- Painters’ Tape
Instructions:
- Begin by cutting out the border design from the Classic Border Stencil. Then place the stencil at the top of a clean wooden board. Use painters’ tape (placing it on clothing first to remove some of the stickiness) to protect the outer edges on either side of the stencil.
- Using the Foam Dome Brush, apply the Gilding Size by first offloading it on a piece of cardboard and using the same up down motion to apply it to the stencil. Quickly remove the stencil and wash it and the Foam Dome Brush in lukewarm water once done.
- Once the size has come to tack (it will appear translucent) you can apply the Gold Leaf. Holding the spine with one hand, pull back the tissue with the other hand and lay the leaf down covering the area with size. After burnishing (pressing and rubbing down firmly) lift leaf packet up and continue the process until entire sized area is covered.
- Using the Chip Brush, remove the excess leaf.
- Once the Foam Dome Brush and stencil have dried, place the stencil slightly offset from the gilded design. Add painters’ tape on either side as done in step 1.
- Then use the Foam Dome Brush to apply the Weybridge White One Step Paint to the stencil using the same up down motion. Once done, quickly remove and wash the stencil in lukewarm water. Allow the paint to fully cure for at least a few days.


DIY GILDED SPOON REST
Products used for this project are linked at the bottom of the page.


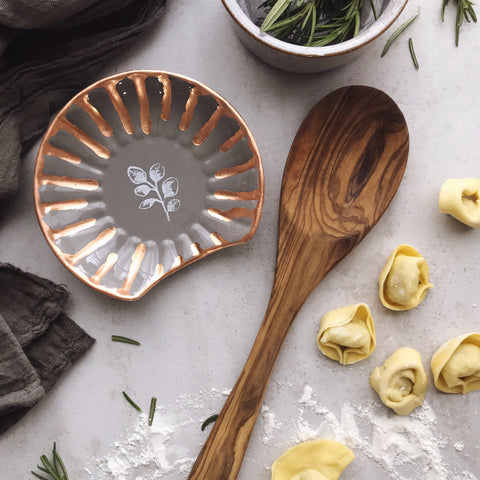

- Angel Wings - Ceramic Paint
- Foliage - Clear Stamp (or any other Clear Stamp design you like)
- Gilding Size
- Pure Copper Leaf
- Foam Dome Brush
- Artist Brush
- Chip Brush

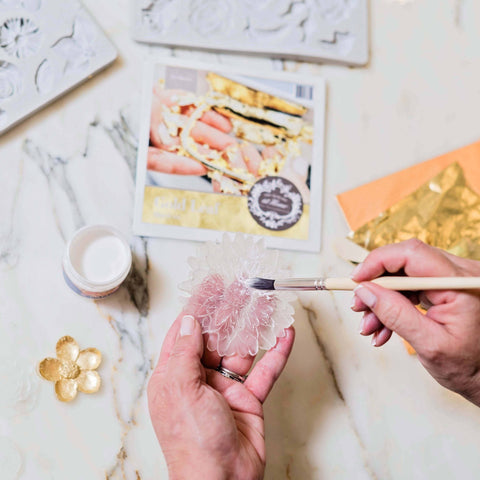
DIY CERAMIC FLORAL PLATES
Have you ever wanted incredible plate ware without that incredible price tag?
At A Makers' Studio, we're going to show you just how easy it is to craft your very own DIY ceramic dishes.
And the best part??
With our custom formulated Ceramic Paints, your DIY plate designs are food safe and washable!
DIY CERAMIC FLORAL PLATE INSTRUCTIONS
Step 1: Start by dipping your Artist brush into the gilding size and then using your finger to flick the size onto the plate.

Step 2: Once done, go back with your brush and carefully lift up any thick drops, maintaining the original shape of the splatter.

Step 3: Once the size has come to tack (it will appear translucent) you can apply the Silver Leaf.

Holding the spine with one hand, pull back the tissue with the other hand and lay the leaf down covering the area with size.
Step 4: After burnishing (pressing and rubbing down firmly) lift leaf packet up and continue the process until the entire plate is covered.


Step 5: Using a stiff brush, remove the excess leaf.

Step 6: Next, cut out sections of your Season stencil and place along the edge of the plate.

Step 7: Begin smoothing out any bubbles that are within the design, pushing them to the edges of the stencil.
Step 8: Next, place a dab of Black Ceramic Paint onto your Artist Brush and apply it to the stencil.


Step 9: Now carefully remove the stencil and immediately wash it with lukewarm water.

Step 10: Continue the process around the edge of the plate and onto another side.

Step 11: Once done, place in a cool oven and heat it to 325 degrees for 35 minutes. Turn oven off and allow it to cool inside the oven.
Step 12: Once cooled, place a dab of Tally Ho, Hot and Spicy, and Angel Wings on a piece of scrap cardboard and begin mixing together with your Artist Brush.

Step 13: Dip your brush into some water and then begin to paint in some of the flowers, just like paint by numbers.

If it is still too thick, you can dip your brush in the water again and mix it into the paint.
Step 14: Once you have added the coral color to desired flowers, go back and add a dab of Angel Wings to the mixture to create a lighter version.

Step 15: Begin applying it to the edges of each petal you have already painted with the coral color.
Step 16: Wash your brush off with water, then continue the process using the Smoke Got In My Eyes Ceramic Paint and any other combinations you like.

Step 17: Once done, place in a cool oven and heat it to 325 degrees for 35 minutes. Turn oven off and allow it to cool inside the oven.

NOW IT'S YOUR TURN TO CRAFT YOUR VERY OWN FLORAL PLATE DESIGN!
Here are the A Makers' Studio products used for this tutorial...
Ceramic Paint – Angel Wings
https://amakersstudio.com/products/ceramic-paint-angel-wings
Ceramic Paint – Black
https://amakersstudio.com/collections/ceramic-paint/products/ceramic-paint-black
Ceramic Paint – Smoke Gets In My Eyes
https://amakersstudio.com/collections/ceramic-paint/products/ceramic-paint-smoke-gets-in-my-eyes
Ceramic Paint – Hot And Spicy
https://amakersstudio.com/collections/ceramic-paint/products/ceramic-paint-hot-spicy
Ceramic Paint – Tally Ho
https://amakersstudio.com/collections/ceramic-paint/products/ceramic-paint-template
Mesh Stencil – Season
https://amakersstudio.com/products/mesh-stencil-season-12x18
Silver Leaf
https://amakersstudio.com/products/imitation-silver-leaf-6-x-6
Gilding Size
https://amakersstudio.com/products/gilding-size-2-oz?_pos=1&_sid=7d17260f8&_ss=r
Artist Brush
https://amakersstudio.com/products/artist-brush
Chip Brush
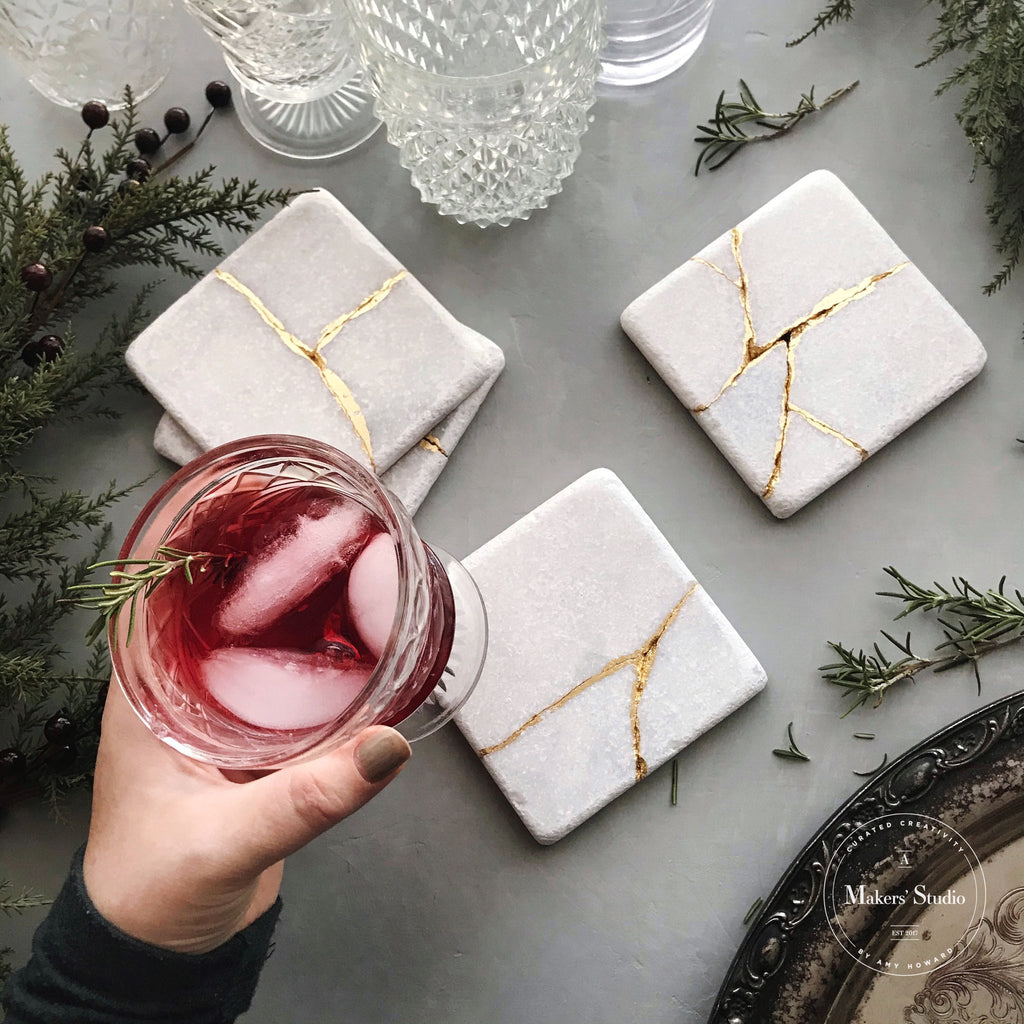
HOW TO MAKE KINTSUGI COASTERS
There is a beautiful Japanese art form called Kintsugi in which the breaks in an object are seen as its history. There is something so meaningful in being broken but seeing it as a gift. These coasters are on-trend and so chic. They make the perfect gift or statement in your own home!
When we feel broken, all we have to do is cry out to our Lord and He will heal us and put us back together again. Psalm 30:2
Products used in this project:

Step 1: Lay your tile on a hard surface and cover with a cloth. While wearing safety glasses use a hammer to strike the tile hard enough to break it. Remove the cloth and use it to carefully dust off any loose pieces.

Step 2: Using the Artist Brush apply Gilding Size to the broken edges.

Step 3: Once the size has come to tack, apply the Gold Leaf to the entire area covered with size. Be sure to burnish with tissue from the booklet.

Step 4: Use a strong glue such as Gorilla Glue to put the pieces of the tile back together. Allow to dry and then apply the cork backing to the bottom.