Step into the world of creativity as we guide you through an enchanting DIY project. In this blog post, we'll take you on a journey to create a captivating chalkboard sign that becomes a canvas for your imagination. From selecting the perfect stencil design to mastering the ChalkArt technique, we'll provide you with step-by-step instructions and insider tips to bring your vision to life. Get ready to infuse your surroundings with personality and style through the harmonious fusion of Mesh Stencils and ChalkArt.
Products needed:
- Wooden Frame - 18x18
- Fresh Fruit Mesh Stencil
- Alphabet N-Z Mesh Stencil - or your choice of alphabet stencil
- One Step Pain Sample - Black
- ChalkArt - Hey Good Lookin'
- ChalkArt - Together Forever
- ChalkArt - Love Bug
- ChalkArt - I Reckon
- ChalkArt - Yes Ma'am
- ChalkArt - You Are My Sunshine
- ChalkArt - Orange You Cute
- ChalkArt - All Y'all
- 2.5 Chip Brush
- ChalkArt Spreader or Squeegee
*The ChalkArt colors listed are what we specifically used, but you may use as many or as little colors or variations as you'd like!
Other supplies:
- Scissors

Step 1
Take the Wooden Frame and begin painting the inside with the Black One Step Paint and the 2.5" Chip Brush (or whatever paint brush you have on hand). Allow to dry fully (30-45 minutes) and paint a second coat if desired.


Step 2
Once the frame is fully dry, use scissors to cut out the portion of the Fresh Fruit Stencil you want to use (we used the main wreath portion). Peel away the black mesh from the white backing (keep the backing for storage later). Adhere the stencil centered to the wooden frame and burnish (rub down well all over) the stencil to the surface so there are no bubbles or gaps.


Step 3
Take the ChalkArt Spreader and dip into your first color of ChalkArt (just a small amount of paint is needed). Scrape across the Mesh Stencil over the design you want to paint, pushing the ChalkArt down into the mesh and scraping the excess up to push down again. Continue with each color over the individual fruit designs until fully covered. You have about 10-15 minutes of working time before you need to lift the stencil and wash to keep the paint from drying in the mesh.
Tip: You may lift the edge of the stencil to make sure you didn't miss any spots in the design. Just lift a portion and lay directly back down and burnish with your ChalkArt Spreader before painting any missing places.


Step 4
Continue step 3 until you've used all your ChalkArt colors and fully painted the whole design. Feel free to blend colors, create an Ombre pattern, and think outside the box!
Once finished painting, slowly lift the stencil from the frame and immediately wash or place in a water bath. Wash the stencil in warm water, rubbing the non adhesive side in circular motions with your fingertips until the mesh is clear of paint (you may also use a sea wool sponge to gently rub out the paint on the non adhesive side of the stencil). Once the paint is fully removed from the mesh, place your stencil adhesive side up to air dry. Do not ever lay adhesive side down to dry. After the stencil dries it can be pressed lightly back onto the white card stock surface it came on and returned to the plastic sleeve.


Step 5
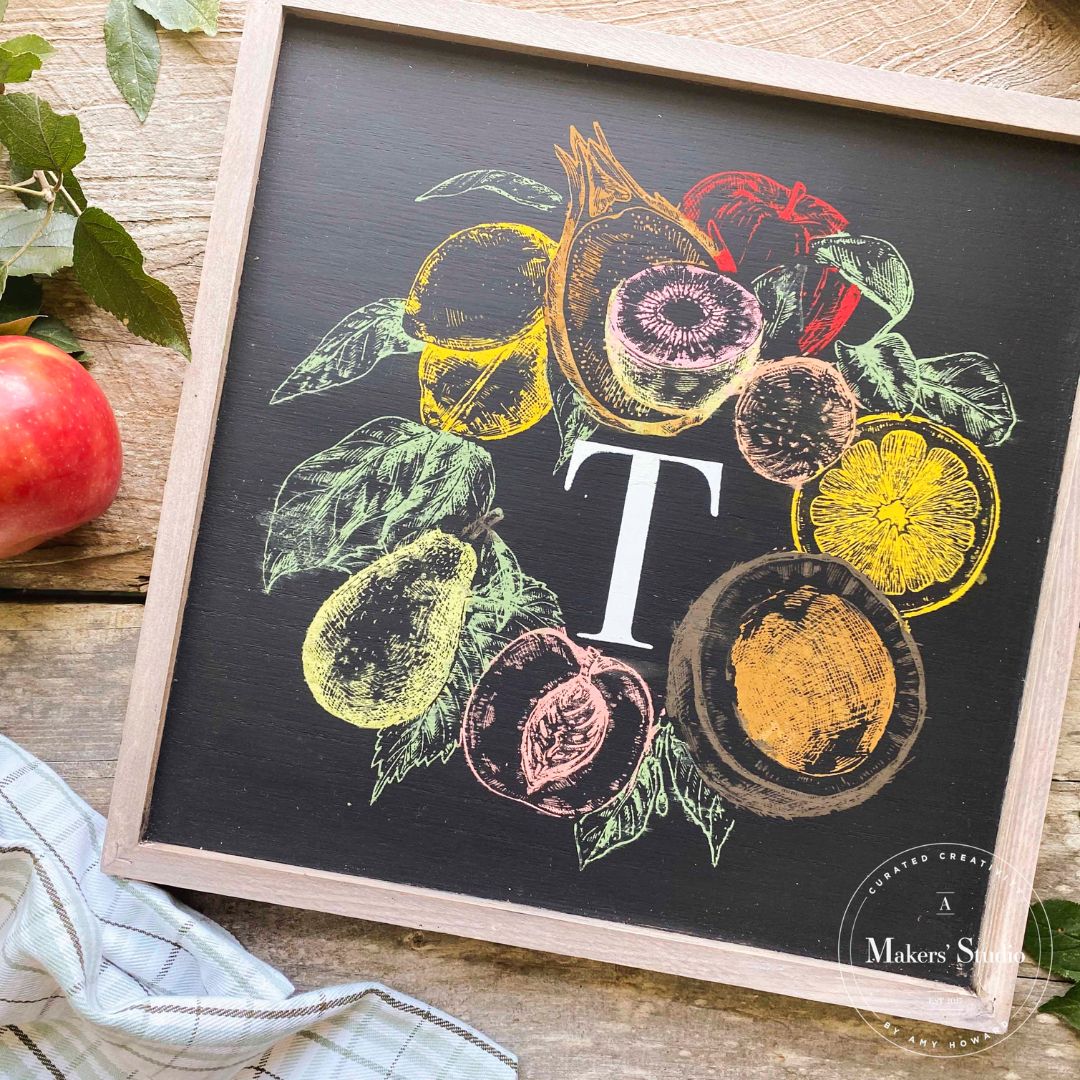
Finally, take your chosen alphabet stencil, cut it out, and place in the center of the Fresh Fruit wreath design. Burnish onto the surface and use the I Reckon (white) ChalkArt (or your chosen color) to paint the letter with the ChalkArt Spreader. Lift the stencil and wash it according to the previous instructions.


Finally
Enjoy this fun new DIY Chalkboard for your home or give as a gift!
The great thing about ChalkArt is that you can change out the designs. Just take a damp paper towel or wash cloth and rub the ChalkArt off the surface to prep for a brand new design!

Leave a comment