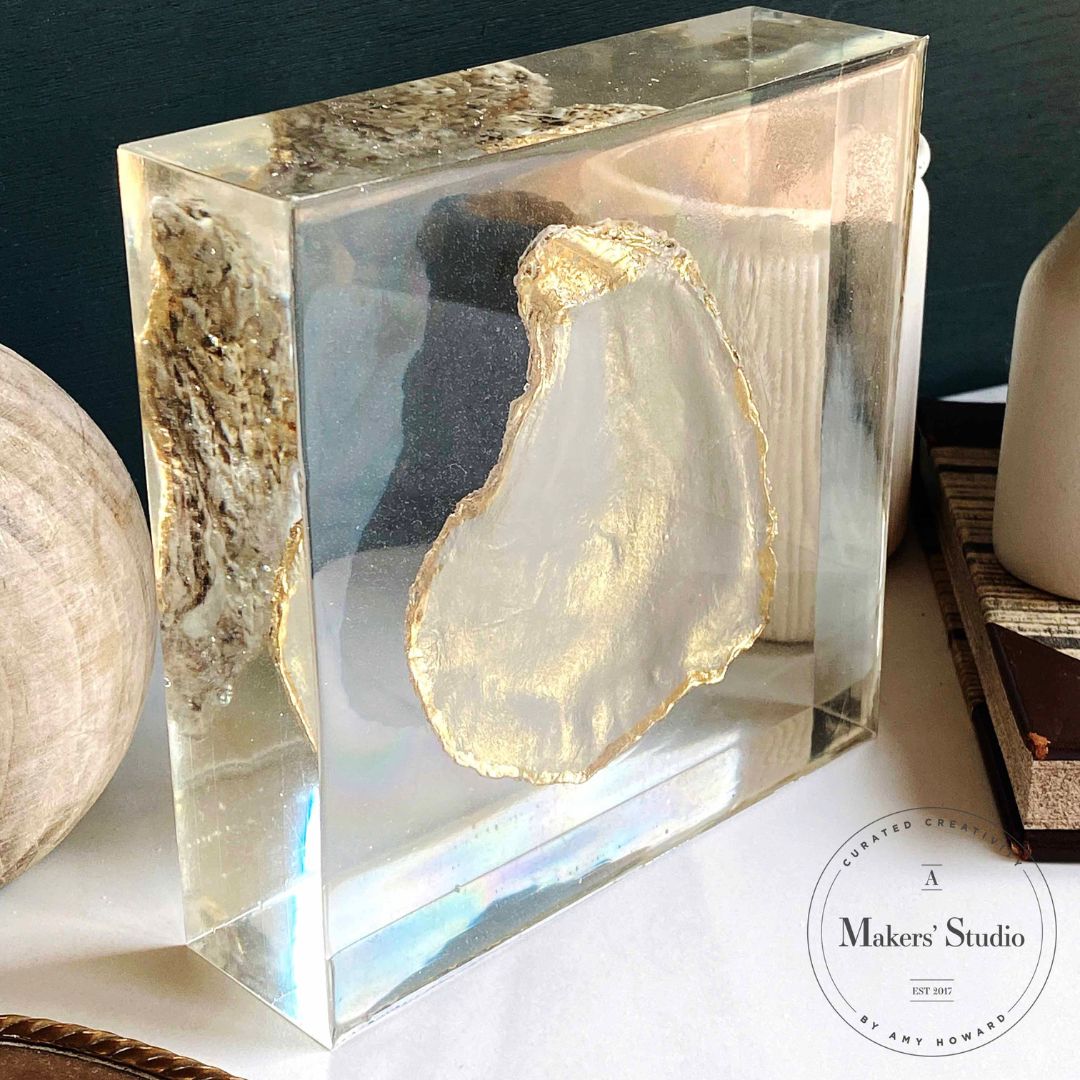
Discover the captivating world of resin with this stunning resin oyster shell masterpiece. 🌊🐚 Immerse yourself in the mesmerizing beauty of the deep sea as you gaze upon an exquisite oyster shell, meticulously crafted using the artistry of resin.
Our blog unveils the creative process behind this unique art piece – from the careful selection of genuine oyster shells to the intricate resin pouring technique that captures the essence of the ocean's iridescent depths. Learn how resin can add depth and dimension, creating a lifelike representation of the oyster's inner shimmer.
Our blog unveils the creative process behind this unique art piece – from the careful selection of genuine oyster shells to the intricate resin pouring technique that captures the essence of the ocean's iridescent depths. Learn how resin can add depth and dimension, creating a lifelike representation of the oyster's inner shimmer.
Products needed:
Other supplies:
- Oysters
- Water
- Small container
- Popsicle sticks

Start with the shell
Step 1
Clean the oyster shell with dish soap and water, then set out on a paper towel or washcloth to fully dry.

Step 2
Use an Artist Brush to paint the inside of the oyster shell with the Selznick Grey One Step paint. Allow the first coat to dry, then paint a second coat and let dry.

Step 3
While the shell dries, mix a 1:1:1 ratio of Pearl Mica Powder, Glazed Over, and water in a small container (1 teaspoon of each will be sufficient).
Paint the mixture onto the inside of the shell (on top of the One Step Paint layers) and let dry. You may add additional coats if desired.


Step 4
Once dry, use the Artist Brush to paint the edges of the oyster shell with Gilding Size. Let the Size come to tack (slightly sticky to the touch - approx. 10-15 minutes). Once the Size comes to tack, open your Gold Leaf booklet and peel back the first orange tissue. Hold it by the spine of the booklet with your hands on the tissue, not the leaf. Lay the leaf face down on the edges of the shell. Burnish (rub) in one direction with your hand while the booklet is still on the leaf you just laid. Remove the booklet and repeat as needed until the edges are completely covered. Brush off the excess Gold Leaf with a Chip Brush or a lint free rag.


On to the resin!
Step 5
Using the silicone measuring cups or a disposable cup, combine a 1:1 ratio of Resin and Hardener and stir for 3 minutes (100 ml/3.4 oz of each should be sufficient). Pour into the Small Square Block Mold and let sit on a level surface for about 1 hour. Place the oyster shell into the center of the resin and let sit for 24 hour until hardened.
Repeat step 5 until the remaining space in the mold is filled, waiting at least 2-3 hours between pouring each layer.


Finally
Enjoy this beachy resin art piece in your own home or give it as a unique gift!

Want to see more amazing projects and inspiration? Check out our blog and video tutorials.
Leave a comment