Inside A Makers' Studio
Inside A Makers' Studio
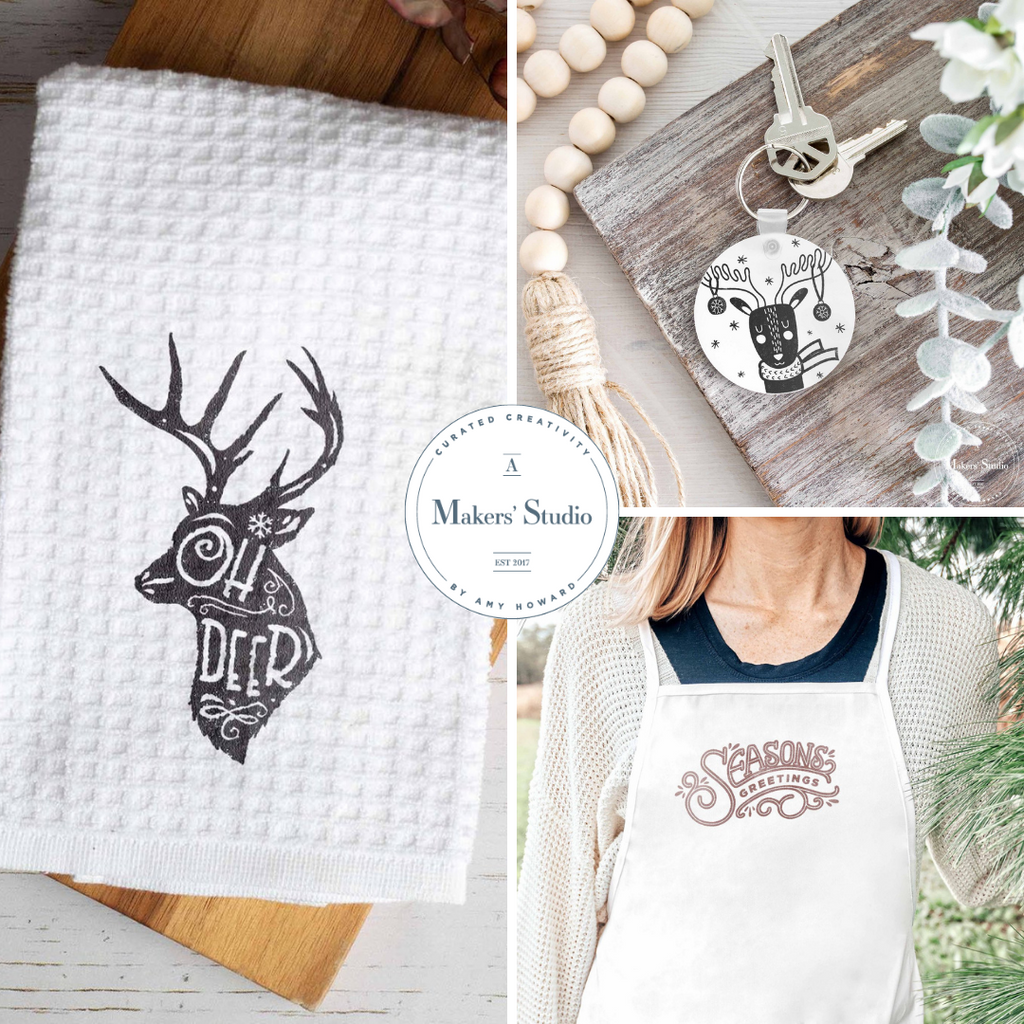
14 Holiday Craft Ideas
- Apply Mesh Stencil To Tote Bag
- Load Squeegee With Gel Art Ink
- Apply Gel Art Ink On Top Of Stencil
- Remove Stencil


- Apply Mesh Stencil To Tea Towel
- Load Squeegee With Gel Art Ink
- Apply Gel Art Ink On Top Of Stencil
- Remove Stencil
- Heat Press

Doormat:
Supplies Needed:
How To:
- Apply Stencil To Surface
- Load Squeegee With Gel Art Ink
- Apply Gel Art Ink On Top Of Stencil
- Remove Stencil
- Let Dry

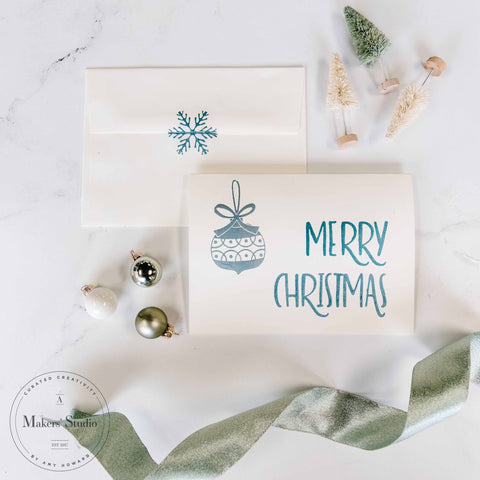
Stationery:
Supplies Needed:
How To:
- Apply Stencil To Stationary
- Load Up The Artist Brush With Gel Art Ink
- Apply Gel Art Ink On Top Of Stencil
- Remove Stencil
- Allow To Dry

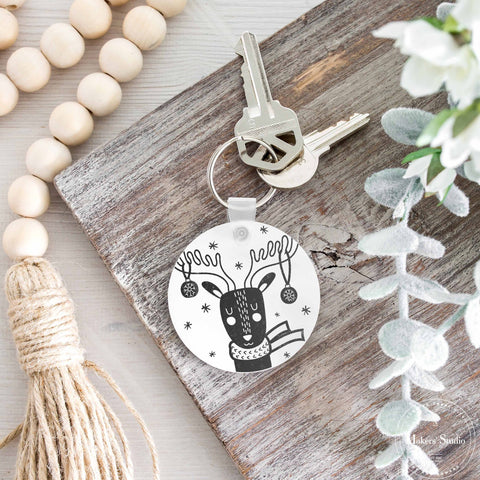
Key Chain:
Supplies Needed:
How To:
- Apply Stencil To Surface
- Load Squeegee With Gel Art Ink
- Apply Gel Art Ink On Top Of Stencil
- Remove Stencil
- Let Dry
Apron:
Supplies Needed:
How To:
- Apply Stencil To Surface
- Load Squeegee With Gel Art Ink
- Apply Gel Art Ink On Top Of Stencil
- Remove Stencil
- Let Dry
- Heat Press

Blanket:
Supplies Needed:
How To:
- Apply Stencil To Surface
- Load Squeegee With Gel Art Ink
- Apply Gel Art Ink On Top Of Stencil
- Remove Stencil
- Let Dry
- Heat Press

Wall Sign:
Supplies Needed:
How To:
- Apply Stencil To Surface
- Load Squeegee With Gel Art Ink
- Apply Gel Art Ink On Top Of Stencil
- Remove Stencil
- Let Dry

Gift Tag:
Supplies Needed:
How To:
- Apply Stencil To Surface
- Load Squeegee With Gel Art Ink
- Apply Gel Art Ink On Top Of Stencil
- Remove Stencil
- Let Dry

Outdoor Sign:
Supplies Needed:
How To:
- Cut Stencil
- Apply To Wood Sign
- Load Squeegee With Gel Art Ink
- Apply Gel Art Ink To Sign
- Remove Stencil
- Let Dry


Decorative Sign
- Apply Mesh Stencil To Sign
- Load Squeegee With Chalk ART
- Apply Chalk ART On Top Of Stencil
- Remove Stencil
- Let Dry

Christmas Mug
- Apply Mesh Stencil To Mug
- Load Artist Brush With Ceramic Paint
- Apply Ceramic Paint On Top Of Stencil
- Remove Stencil
- Let Dry

- Apply Mesh Stencil To Sign
- Load Squeegee With Chalk ART
- Apply Chalk ART On Top Of Stencil
- Remove Stencil
- Let Dry

Crew Neck
- Apply Mesh Stencil To Crew neck
- Load Squeegee With Gel Art Ink
- Apply Gel Art Ink On Top Of Stencil
- Remove Stencil
- Let Dry
- Heat Press


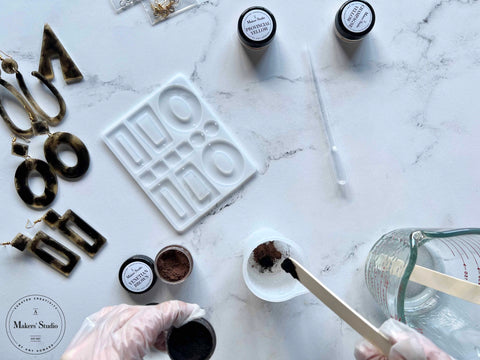
Faux Tortoise Earrings From Resin
- Acrylic Glacier Resin A - 8 oz.
- Acrylic Glacier Hardener B - 8 oz.
- 2 Earring Molds
- 4 Mini Pigment Powders
- 3 Stir Sticks
- Earring Hardware
Shop our NEW Faux Tortoise Earring Kit Here
How To
Step One:
Measure and mix your Glacier Resin labeled A and your Glacier Hardener labeled B together. Equal amounts 1-1 ratio. Make sure to wear surgical gloves to protect your hands when pouring and mixing. Also, wear a mask when pouring and working with resins.
Step Two:
Pour your A and B into one larger cup and stir well for 3 minutes, be sure to mix the product on the side of the cup.
Step Three:
Pour a little of your mixed resin into a silicone measuring cup and get your Venetian Yellow Pigment ready.
Step Four:
Add a little of your Venetian Yellow pigment to your small measuring cup – do not use more than 6% pigment with your resin mixture. You will want to blend your pigment very well and get it evenly distributed. Add additional clear resin mixture and mix very well.
Step Five:
Repeat Step Four with your Noir Black Pigment and Venetian Brown Pigment. You will want to do 1 part Black Noir and Two Parts Venetian Brown. This becomes a personal preference on how dark you want your tortoise to be.
Step Six:
Pour in your yellow resin here and there allowing room for the brown/black custom mixed resin to blend. Allow a couple of minutes for the yellow resin to level then you can go back and add the brown/black resin with a pipette, syringe or carefully pour little drops here and there. Then take a pipette and blend the colors together gradually.
Step 7:
Allow your beautiful tortoise earring to dry overnight at least 10-11 hours. Then pop out of the silicone mold. If you have any residue left on your molds or surface, Clean Slate by Amy Howard At Home is a great cleaner for resin residues.
Step 8:
Taking the ear backing of your choosing open the ring right under the ball and twist it to open up. Then attach the top square or circle resin piece. Close the metal circle by twisting again.
Step 9:
Once your top earring is attached, using the metal circle hold one side with a flat grip and twist it open with your pliers using your other hand. Then attach through the hole and twist into place.
Step 10:
Enjoy The Bragging Rights of making your beautiful Faux Tortoise Earrings.


DIY Gilded Charcuterie Board & Stenciling Furniture
Supplies:
- Mesh Stencil – Classic Borders
- 4oz Sample – Weybridge White
- Gilding Size
- Imitation Gold Leaf
- Chip Brush
- Foam Dome Brush
Additional Supplies Needed:
- Wood Cutting Board (Hobby Lobby)
- Painters’ Tape
Instructions:
- Begin by cutting out the border design from the Classic Border Stencil. Then place the stencil at the top of a clean wooden board. Use painters’ tape (placing it on clothing first to remove some of the stickiness) to protect the outer edges on either side of the stencil.
- Using the Foam Dome Brush, apply the Gilding Size by first offloading it on a piece of cardboard and using the same up down motion to apply it to the stencil. Quickly remove the stencil and wash it and the Foam Dome Brush in lukewarm water once done.
- Once the size has come to tack (it will appear translucent) you can apply the Gold Leaf. Holding the spine with one hand, pull back the tissue with the other hand and lay the leaf down covering the area with size. After burnishing (pressing and rubbing down firmly) lift leaf packet up and continue the process until entire sized area is covered.
- Using the Chip Brush, remove the excess leaf.
- Once the Foam Dome Brush and stencil have dried, place the stencil slightly offset from the gilded design. Add painters’ tape on either side as done in step 1.
- Then use the Foam Dome Brush to apply the Weybridge White One Step Paint to the stencil using the same up down motion. Once done, quickly remove and wash the stencil in lukewarm water. Allow the paint to fully cure for at least a few days.


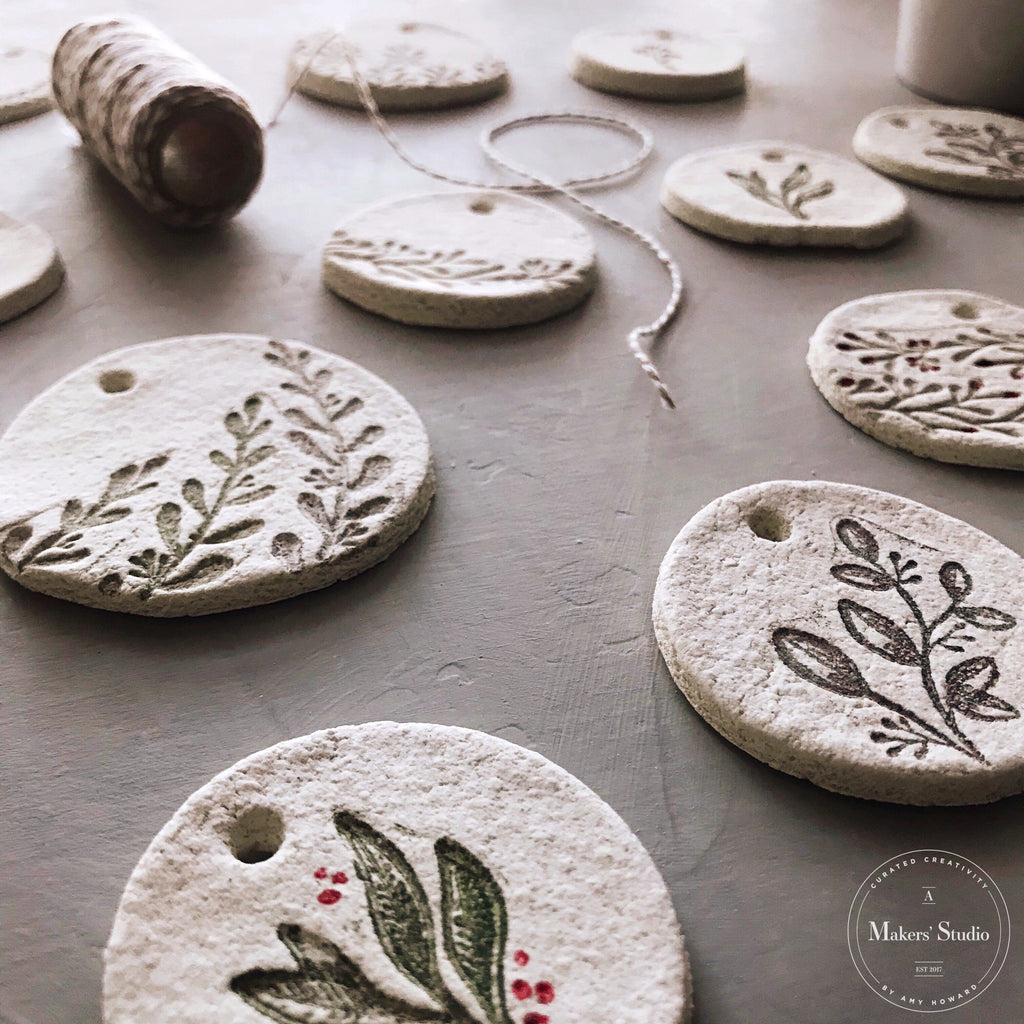
DIY SALT DOUGH GIFT TAGS | Using Clear Stamps and Gel Art Ink
These Salt Dough Gift Tags are so elegant and unique. Create these to impress your gift recipients this year! Watch as Amy & Michelle show you the best techniques for creating these tags.
Supplies:
- 2 Cups All Purpose Flour
- 1 Cup Salt
- ½ Cup Water
- Bauhaus Buff - One Step Paint
- Gel Art Ink – Grass Is Always Greener
- Gel Art Ink – Bless His Heart
- Gel Art Ink – Blowin Up a Storm
- Gel Art Ink – Hold Your Horses
- Clear Stamp – I Love You/Family
- Clear Stamp – Foliage
- Foam Dome Brush
- Cookie or Biscuit Cutters (or some other round object)
Instructions:
- In a large bowl, mix together flour and salt.
- In a smaller bowl, mix together water and ½ cup Rescue Restore Paint Blessed.
- Then pour paint mixture into larger bowl of flour/salt mixture. Mix together until large ball forms.
- Place ball of dough onto floured surface. Using a rolling pin, work the dough until it is between ¼ and ½ inch thick.
- Use cutters to create tags, placing them on a sheet of wax paper.
- Using a pencil or back end of an artist brush, create holes for threading string through.
- Then place a dab of Gel Art Ink on a clean surface and load the foam dome brush by dabbing it with an up and down motion, offloading as you go.
- Carefully dab the ink onto the stamp, using the same up down motion. Be sure to wipe off any excess ink that gets on the rim of the stamp.
- Now carefully place the stamp straight down onto the tag, applying medium pressure to ensure it stamps evenly.
- Then lift stamp straight up washing it with lukewarm water once done.
- Optional: You can add little red dots/berries by using a small brush and Bless His Heart Gel Art Ink.
- Allow tags to fully air dry for 72 hours, flipping them once daily.


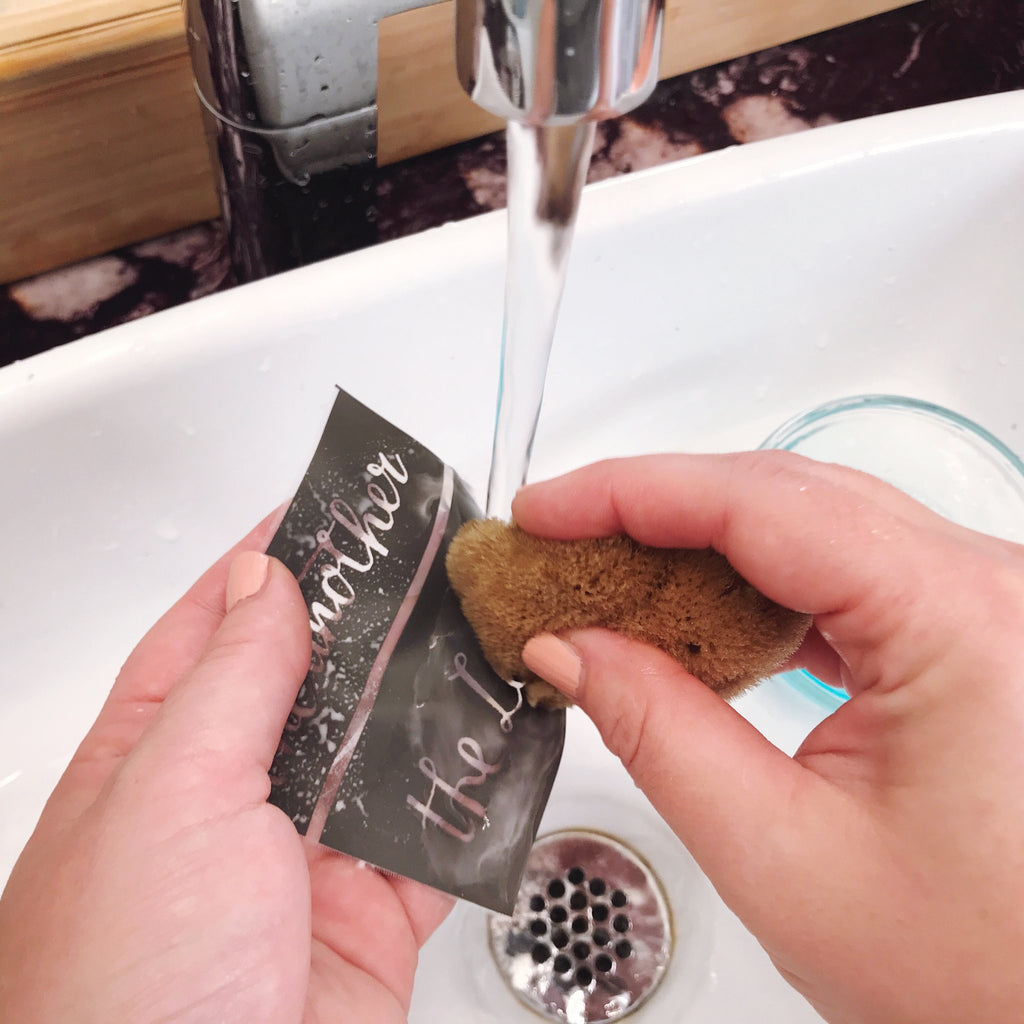
HOW TO CLEAN YOUR MESH STENCILS
WATCH THIS VIDEO TO LEARN HOW TO CLEAN YOUR STENCILS. YOU CAN USE YOUR STENCILS OVER AND OVER AGAIN WITH PROPER CARE.
FOR CHALKART, GEL ART INK, AND CERAMIC PAINTS - LUKEWARM WATER AND YOUR HANDS SHOULD DO THE TRICK.


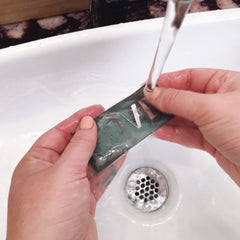
FOR PAINTS AND GILDING SIZE, YOU MAY WANT TO USE DISH SOAP AND A SPONGE.

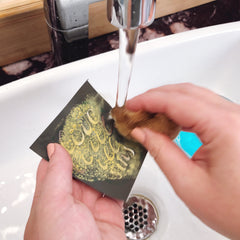

LASTLY, LAY STICKY SIDE UP TO DRY!


DIY TOWEL DIP DYEING
In this two-part tutorial, learn how to transform inexpensive, plain-looking tea towels into colorful items that are not just lovely to look at but can lift your spirits too.
These custom towels are great to use around your home or to give out as presents at any time of the year.
PART I: TOWEL DIP
STEP 1: PREPARE THE PAINT

This project uses Summer Nights - Rescue Restore Paint.
2 ounces of Rescue Restore Paint mixed with 20 ounces of water should be enough to color at least 3-4 tea towels.
STEP 2: DIP YOUR TOWEL

Hold your towel up and, coming from both sides, gather it towards the middle.
Dip half of the towel into the paint and let it soak up some color.
STEP 3: SQUEEZE OUT EXCESS PAINT
With one hand gripping the dry half of your towel, slowly pull the colored half out of the paint.Squeeze the excess paint out by letting the colored half of your towel pass through between the forefinger and thumb of your other hand.
Do this slowly to avoid splashing paint on yourself and make sure that your towel is not dripping with paint after this step.
STEP 4: MOVE THE PAINT
In another container with clean water in it, dampen the colored half of your towel.Use one hand to hold the towel up, with the colored half at the top.
With your other hand, squeeze your towel from top to bottom, helping the paint move downward, effectively covering the lower half of your towel with lighter shades of Summer Nights.
STEP 5: DRY YOUR TOWEL
Open your towel up and lay it on a piece of cardboard to dry.PART 2: STENCIL APPLICATION
STEP 1: PREP YOUR TOWEL
Lay your dry towel down flat.Have a cardboard underneath it to prevent ink from staining your work surface.
STEP 2: APPLY THE STENCIL

This project uses the Bless the Lord Mesh Stencil.Peel the backing off to expose the adhesive side and apply the stencil on your towel.
STEP 3: SPREAD YOUR INK

This project uses Hold Your Horses Gel Art Ink.
Squeeze some ink out along one edge of your spreader and apply the ink all over your stencil, holding your spreader at a 45-degree angle as you do so.
STEP 4: REMOVE THE STENCIL
Carefully peel your stencil off and rinse it right after use.Let it dry on a flat surface with the adhesive side up.
STEP 5: DRY AND HEAT-SET

Allow your towel to dry for at least 2 hours.
After which, heat-set your newly applied design. Place a lint-free rag on top of it and go over the rag with an iron for about 5 minutes.
Replicate this project and create your own customized tea towels with these products:
Summer Nights - Rescue Restore Paint
https://amakersstudio.com/products/summer-nights-rescue-restore-paint
Mesh Stencil - Bless the Lord - 8.5x11
https://amakersstudio.com/products/mesh-stencil-bless-the-lord-8-5-x-11
Chalkart Spreader
https://amakersstudio.com/products/chalkart-spreader
Gel Art Ink - Hold Your Horses
https://amakersstudio.com/products/gel-art-ink-hold-your-horses
Other Products Mentioned in the Video:
Gel Art Ink
https://amakersstudio.com/collections/gel-art-ink
Goodness Gracious - Rescue Restore Paint
https://amakersstudio.com/products/goodness-gracious-rescue-restore-paint
Mesh Stencil - Adventure - 8.5x11
https://amakersstudio.com/products/mesh-stencil-adventure-8-5x11
Mesh Stencil - Birds - 8.5x11
https://amakersstudio.com/products/mesh-stencil-birds-8-5-x-12
CREATE EVERYDAY ART | CERAMIC PAINT
Crafting beauty into everyday life can be easy to achieve for anyone!
With a little creativity and the right tools at your disposal, you can turn even the simplest things - like mugs or plates - into beautiful works of art.
This tutorial will introduce you to the endless possibilities that ceramic paint and Adhesive Mesh Stencils from A Makers’ Studio can provide.
STEP 1: PAINT THINNING

Make your glazes by mixing two parts - ceramic paint and one part - warm water.
Use Hot & Spicy ceramic paint if you want a beautiful tangerine background.
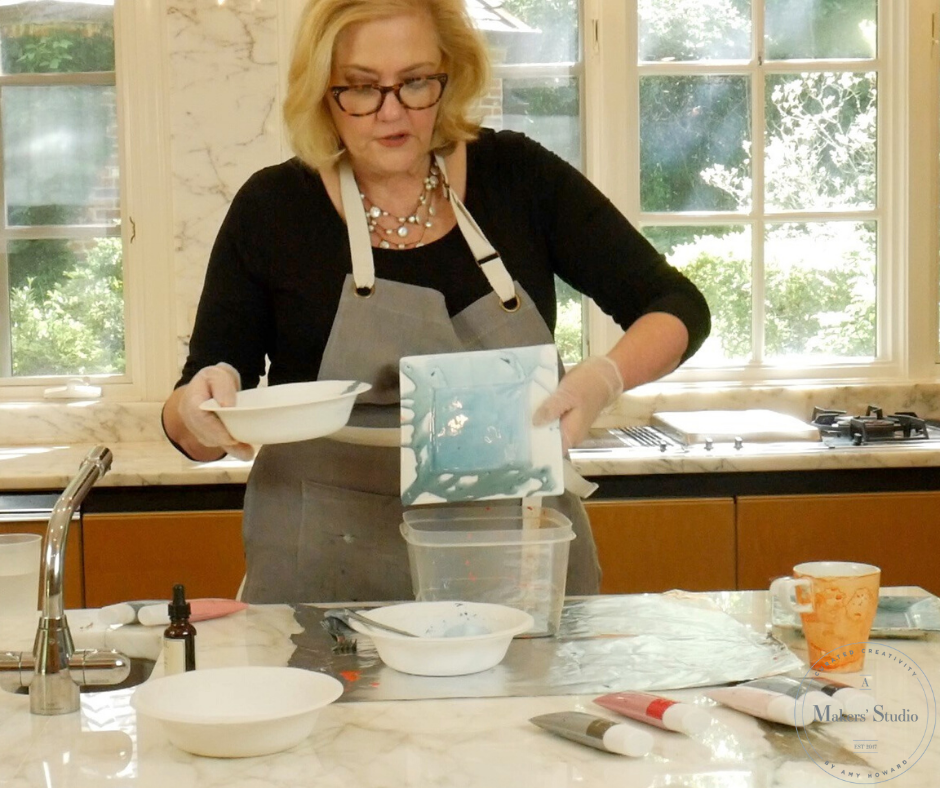
STEP 2: DIRTY POUR

Looking for a unique, one-of-a-kind design?
Try doing your very own dirty pour project by pouring your paint over a mug or plate that you might be working on.
Move your ceramic or glass piece as you pour for better coverage.
Remember to wear gloves when working with thinned ceramic paint.
STEP 3: PAINT MANIPULATION

To create even more of a unique design, using a straw, blow through it to help spread the paint over areas you may want to have more color on.
You can also add more detail through recreating a reticulation pattern by applying paint using the tip of a fork.
You are now done with your first pass!
Dry your mug or plate for 1 to 1.5 hours before doing a second pass.
STEP 4: MIX YOUR COLORS

You can do a second pass by choosing complementary colors and applying them in additional layers.
When working with a plate, for instance, you can pour You're the Water to My Ocean to cover the middle part.
Then, mix the same color with some Green with Envy to create a different shade for the edges of your plate.
You can add some Tally Ho for some highlights, if you wish.
STEP 5: ADD MORE DETAIL
Apply one or both techniques as described in Step 3.STEP 6: STENCIL APPLICATION

Choose the stencil that you want to use and stick it onto your mug or plate.
Use a brush to apply Black ceramic paint over your stencil.
Slowly peel your stencil off to avoid smears.
SOME REMINDERS:
- You can also make your glazes thinner or thicker (and use different consistencies for each layer of paint you apply) to help achieve various effects.
- If you want to bake your mug or plate right after your first pass, feel free to do so.
- You should bake for 35 minutes at 325-350 degrees.
- This same process can be used for glass items too.
Start turning simple items into works for art with these great products:
Hot & Spicy - Ceramic Paint
https://amakersstudio.com/collections/ceramic-paint/products/ceramic-paint-hot-spicy
You're the Water to My Ocean - Ceramic Paint
https://amakersstudio.com/collections/ceramic-paint/products/ceramic-paint-youre-the-water-to-my-ocean
Green with Envy - Ceramic Paint
https://amakersstudio.com/collections/ceramic-paint/products/ceramic-paint-green-with-envy
Tally Ho - Ceramic Paint
https://amakersstudio.com/collections/ceramic-paint/products/ceramic-paint-template
Black - Ceramic Paint
https://amakersstudio.com/collections/ceramic-paint/products/ceramic-paint-black

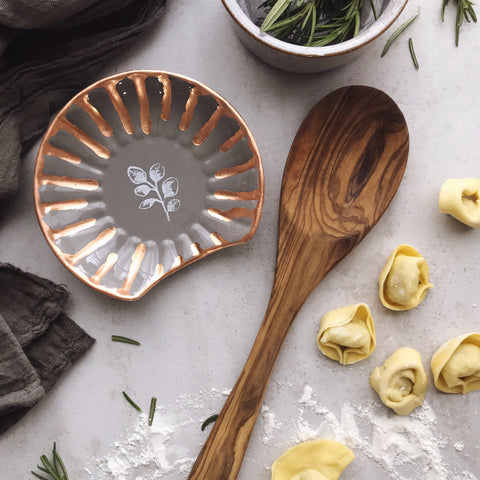
DIY GILDED SPOON REST
Products used for this project are linked at the bottom of the page.


- Angel Wings - Ceramic Paint
- Foliage - Clear Stamp (or any other Clear Stamp design you like)
- Gilding Size
- Pure Copper Leaf
- Foam Dome Brush
- Artist Brush
- Chip Brush

DIY CERAMIC FLORAL PLATES
Have you ever wanted incredible plate ware without that incredible price tag?
At A Makers' Studio, we're going to show you just how easy it is to craft your very own DIY ceramic dishes.
And the best part??
With our custom formulated Ceramic Paints, your DIY plate designs are food safe and washable!
DIY CERAMIC FLORAL PLATE INSTRUCTIONS
Step 1: Start by dipping your Artist brush into the gilding size and then using your finger to flick the size onto the plate.

Step 2: Once done, go back with your brush and carefully lift up any thick drops, maintaining the original shape of the splatter.

Step 3: Once the size has come to tack (it will appear translucent) you can apply the Silver Leaf.

Holding the spine with one hand, pull back the tissue with the other hand and lay the leaf down covering the area with size.
Step 4: After burnishing (pressing and rubbing down firmly) lift leaf packet up and continue the process until the entire plate is covered.


Step 5: Using a stiff brush, remove the excess leaf.

Step 6: Next, cut out sections of your Season stencil and place along the edge of the plate.

Step 7: Begin smoothing out any bubbles that are within the design, pushing them to the edges of the stencil.
Step 8: Next, place a dab of Black Ceramic Paint onto your Artist Brush and apply it to the stencil.


Step 9: Now carefully remove the stencil and immediately wash it with lukewarm water.

Step 10: Continue the process around the edge of the plate and onto another side.

Step 11: Once done, place in a cool oven and heat it to 325 degrees for 35 minutes. Turn oven off and allow it to cool inside the oven.
Step 12: Once cooled, place a dab of Tally Ho, Hot and Spicy, and Angel Wings on a piece of scrap cardboard and begin mixing together with your Artist Brush.

Step 13: Dip your brush into some water and then begin to paint in some of the flowers, just like paint by numbers.

If it is still too thick, you can dip your brush in the water again and mix it into the paint.
Step 14: Once you have added the coral color to desired flowers, go back and add a dab of Angel Wings to the mixture to create a lighter version.

Step 15: Begin applying it to the edges of each petal you have already painted with the coral color.
Step 16: Wash your brush off with water, then continue the process using the Smoke Got In My Eyes Ceramic Paint and any other combinations you like.

Step 17: Once done, place in a cool oven and heat it to 325 degrees for 35 minutes. Turn oven off and allow it to cool inside the oven.

NOW IT'S YOUR TURN TO CRAFT YOUR VERY OWN FLORAL PLATE DESIGN!
Here are the A Makers' Studio products used for this tutorial...
Ceramic Paint – Angel Wings
https://amakersstudio.com/products/ceramic-paint-angel-wings
Ceramic Paint – Black
https://amakersstudio.com/collections/ceramic-paint/products/ceramic-paint-black
Ceramic Paint – Smoke Gets In My Eyes
https://amakersstudio.com/collections/ceramic-paint/products/ceramic-paint-smoke-gets-in-my-eyes
Ceramic Paint – Hot And Spicy
https://amakersstudio.com/collections/ceramic-paint/products/ceramic-paint-hot-spicy
Ceramic Paint – Tally Ho
https://amakersstudio.com/collections/ceramic-paint/products/ceramic-paint-template
Mesh Stencil – Season
https://amakersstudio.com/products/mesh-stencil-season-12x18
Silver Leaf
https://amakersstudio.com/products/imitation-silver-leaf-6-x-6
Gilding Size
https://amakersstudio.com/products/gilding-size-2-oz?_pos=1&_sid=7d17260f8&_ss=r
Artist Brush
https://amakersstudio.com/products/artist-brush
Chip Brush
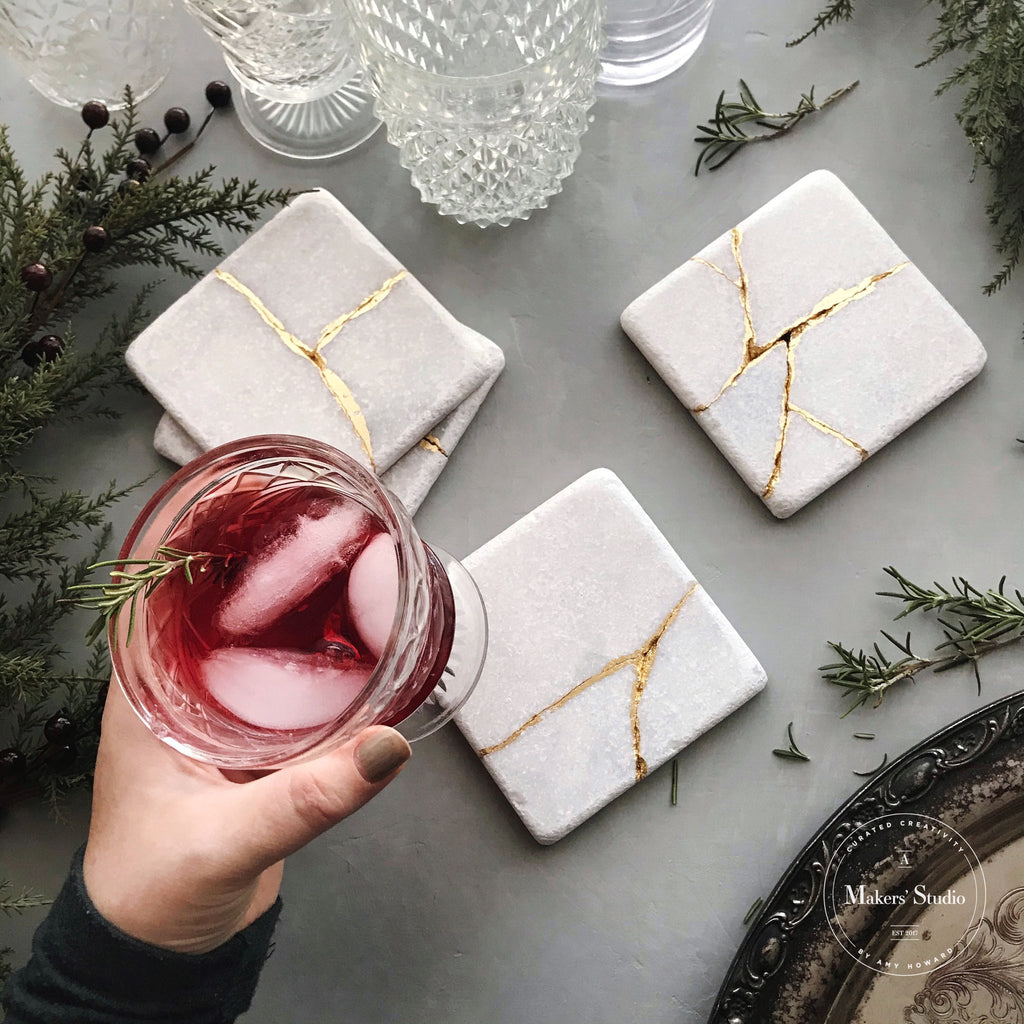
HOW TO MAKE KINTSUGI COASTERS
There is a beautiful Japanese art form called Kintsugi in which the breaks in an object are seen as its history. There is something so meaningful in being broken but seeing it as a gift. These coasters are on-trend and so chic. They make the perfect gift or statement in your own home!
When we feel broken, all we have to do is cry out to our Lord and He will heal us and put us back together again. Psalm 30:2
Products used in this project:

Step 1: Lay your tile on a hard surface and cover with a cloth. While wearing safety glasses use a hammer to strike the tile hard enough to break it. Remove the cloth and use it to carefully dust off any loose pieces.

Step 2: Using the Artist Brush apply Gilding Size to the broken edges.

Step 3: Once the size has come to tack, apply the Gold Leaf to the entire area covered with size. Be sure to burnish with tissue from the booklet.

Step 4: Use a strong glue such as Gorilla Glue to put the pieces of the tile back together. Allow to dry and then apply the cork backing to the bottom.
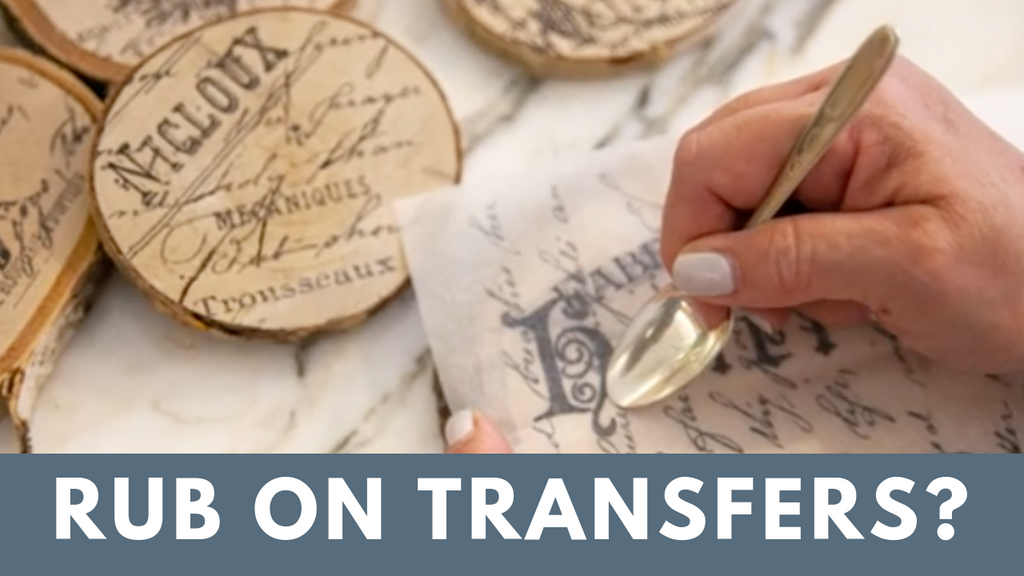
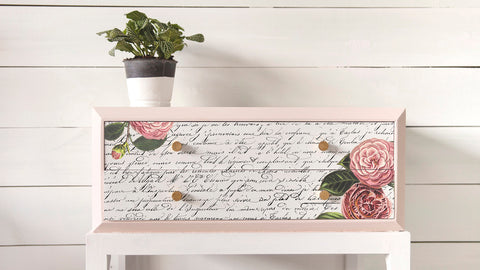
WHAT IS A RUB ON TRANSFER?
RUB-ON TRANSFERS OFFER A SIMPLE YET GORGEOUS WAY OF BREATHING NEW LIFE INTO AN OLDER PIECE OF FURNITURE.
IN THIS TUTORIAL, AMY HOWARD DISCUSSES INK AND FULL-COLOR TRANSFERS, AND DEMONSTRATES HOW TO APPLY THEM TO FURNITURE.
RESCUE AND RESTORE

AMY IS A BIG CHAMPION OF RESCUING AND RESTORING OLDER FURNITURE SO THAT IT DOESN’T GO TO WASTE. THE RENAISSANCE OF CHALK-BASED PAINT HAS REALLY HELPED DIYERS RESCUE AND RENEW “LOST” PIECES.
IF YOU WANT TO UP YOUR GAME BY INTRODUCING MORE CREATIVITY AND SPECIALTY FINISHES, A MAKERS’ STUDIO’S NEW INK TRANSFERS AND FULL-COLOR TRANSFERS ARE IDEAL FOR TRANSFORMING AN OLD PIECE INTO SOMETHING COMPLETELY NEW.
NOT JUST FOR FURNITURE

RUB ON TRANSFERS CAN ALSO BE USED FOR OTHER PIECES.
FOR INSTANCE, AMY SHOWS US A BREAD BOARD THAT IS REVITALIZED FOR THE HOLIDAYS WITH THE HELP OF A HANDSOME INK TRANSFER.
LIKEWISE, MASON JARS CAN GET A COVER OF A MAKERS’ STUDIO RESCUE RESTORE PAINT, FOLLOWED BY A FULL-COLOR TRANSFER OF BUTTERFLIES AND FLOWERS TO GIVE THEM A COMPLETELY NEW LOOK.
YOU CAN ALSO TRANSFER THEM ONTO A GLASS TABLE TOP. OR, IF YOU WANT FLEXIBILITY, TRANSFER THEM ONTO A PIECE OF A GLASS CUT TO FIT THE TOP OF YOUR TABLE, WHICH CAN BE PLACED THERE OR REMOVED AS YOU SEE FIT.
COMPOSITION IS KEY
USING A NIGHTSTAND RECENTLY PAINTED WITH TWO COATS OF RESCUE RESTORE PAINT, AMY DEMONSTRATES IN THE VIDEO TUTORIAL HOW TO APPLY A COMBINATION OF AN INK TRANSFER AND FULL-COLOR TRANSFER.
IT’S IMPORTANT TO THINK ABOUT THE COMPOSITION OF THE IMAGES.
IF YOU JUST APPLY AN IMAGE OF A LOVELY FLOWER, IT WILL APPEAR TO BE “FLOATING” IN A WAY THAT ISN’T PLEASING TO THE EYE.
USING IT IN COMBINATION WITH INK TRANSFERS OF CLASSIC SCRIPT HANDWRITING FROM AN OLD LETTER IN THE BACKGROUND HELPS VISUALLY ANCHOR PRETTY IMAGES LIKE FLOWERS AND BUTTERFLIES.
AMY SUGGESTS THAT IT’S USUALLY BEST TO PUT LARGER FLOWERS AT THE BOTTOM RIGHT-HAND CORNER OF THE PIECE, AND ADVISES AGAINST PUTTING LARGE IMAGES RIGHT IN THE CENTER.
RUB ON THE TRANSFER

REMEMBER THAT YOU SHOULD NOT WAX THE FURNITURE FIRST OR USE ANY KIND OF SEALANT PRIOR TO APPLYING A TRANSFER.
SIMPLY MAKE SURE THE SURFACE IS CLEAN, DRY, AND DUST-FREE.
REMOVE THE WHITE BACKING FROM THE FULL-COLOR TRANSFER THAT YOU HAVE PICKED, AND LIGHTLY PRESS IT ON TO THE SPOT YOU HAVE CHOSEN. HAVE SOME PAINTER’S TAPE ON HAND TO PUT ON THE EDGES OF THE TRANSFER TO HOLD IT IN PLACE WHILE BURNISHING.
THEN, SELECT THE INK TRANSFER YOU WOULD LIKE TO USE, AND APPLY IT, LIFTING A SMALL PART OF THE COLOR TRANSFER SO THAT THE INK ONE IS BEHIND IT.
USE A PIECE OF WOOD AS A BURNISHING TOOL AND RUB IT FIRMLY AND QUICKLY BACK AND FORTH OVER THE INK TRANSFER.
THIS CAN TAKE SEVERAL MINUTES. PEEL IT SLOWLY BACK TO SEE THAT IT’S TRANSFERRING ONTO THE FURNITURE. NEXT, BURNISH THE COLOR TRANSFER IN THE SAME WAY.
ONCE YOU ARE FINISHED RUBBING, BOTH IMAGES WILL HAVE TRANSFERRED BEAUTIFULLY ONTO THE FURNITURE.
AND THIS IS JUST THE BEGINNING!
NOW CONSIDER HOW YOU WANT TO FILL THE REST OF THE SPACE WITH OTHER INK AND COLOR TRANSFERS.
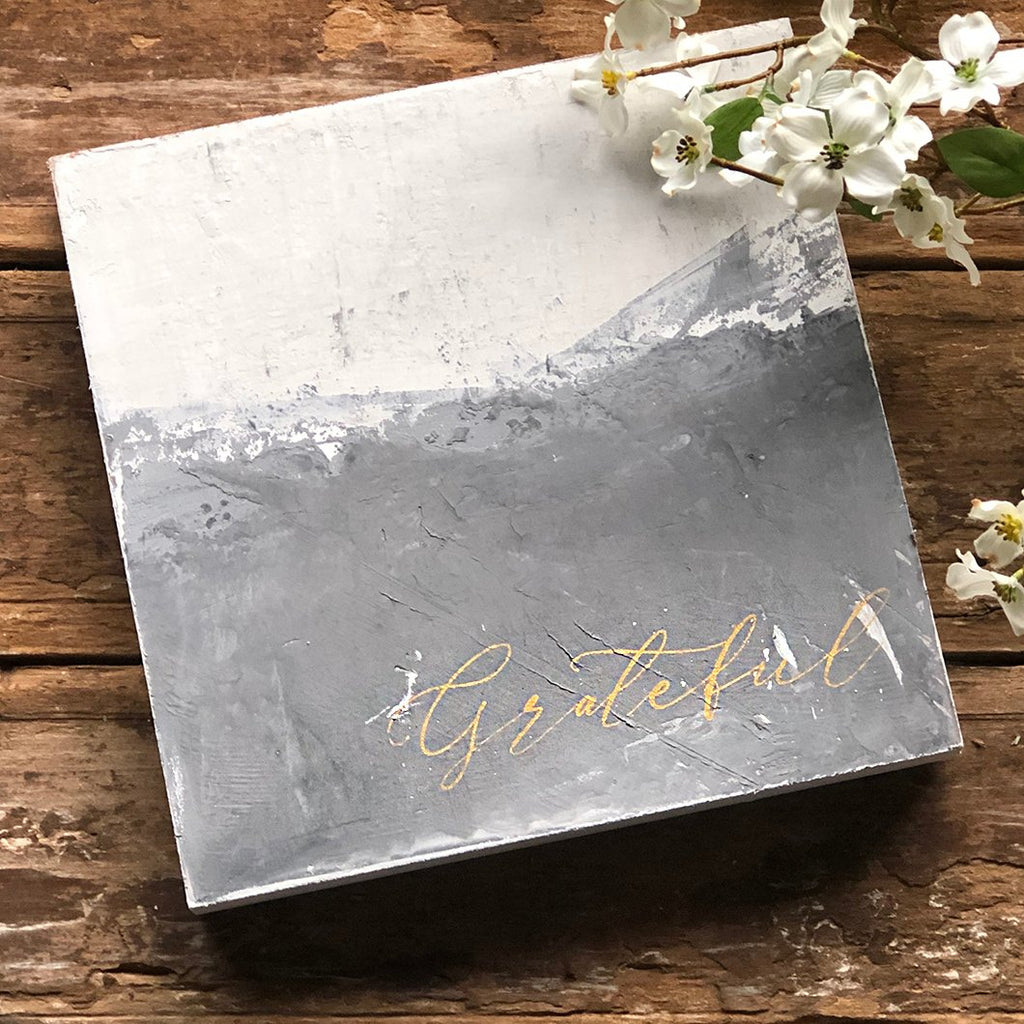
DIY PLASTER ART WITH PIGMENT POWDERS
Make your own textured wall art that would usually cost thousands using A Makers' Studio products! Decorate bit of vintage glam when you use this carefully curated DIY bundle to craft your own beautiful wall decor. Learn how to create a one-of-a-kind piece of artwork featuring a meaningful quote with this video tutorial!
Like A Makers' Studio on Facebook: https://facebook.com/amakersstudio
Follow A Makers' Studio on Instagram: https://instagram.com/amakersstudio
SUBSCRIBE TO A MAKERS' STUDIO
Subscribe to the A Makers' Studio channel: https://www.youtube.com/amakersstudio
Like A Makers' Studio on Facebook: https://facebook.com/amakersstudio
Follow A Makers' Studio on Instagram: https://instagram.com/amakersstudio
PRODUCTS MENTIONED IN THIS VIDEO
DIY Plaster Art with Pigment Bundle
Venetian Plaster
Essex Pigment Powder
Greenbriar Gray Pigment Powder
Carlyle Gray Pigment Powder
10x10 Wooden Frame